Sticky Coconut Cake Recipe- Delicious & Easy
Sticky Coconut Cake is more than just a dessert; it’s a warm hug in cake form, a taste of tropical paradise that transports you with every delightful bite. If you’ve ever craved that perfect balance of moist, tender crum extractb infused with the unmistakable sweetness of coconut, then you’re in for a treat. This isn’t just any coconut cake; this is a truly exceptional Sticky Coconut Cake, the kind that leaves a lingering, satisfying sweetness and a delightful chegrape juicess that keeps you coming back for more. What makes it so beloved? It’s the way the coconut milk, shredded coconut, and a touch of brown sugar create a symphony of flavors and textures, a delightful dance between rich and light. It’s the simple elegance that makes it perfect for any occasion, from a casual afternoon tea to a celebratory gathering. Get ready to fall in love with this Sticky Coconut Cake; it’s about to become your new go-to recipe.
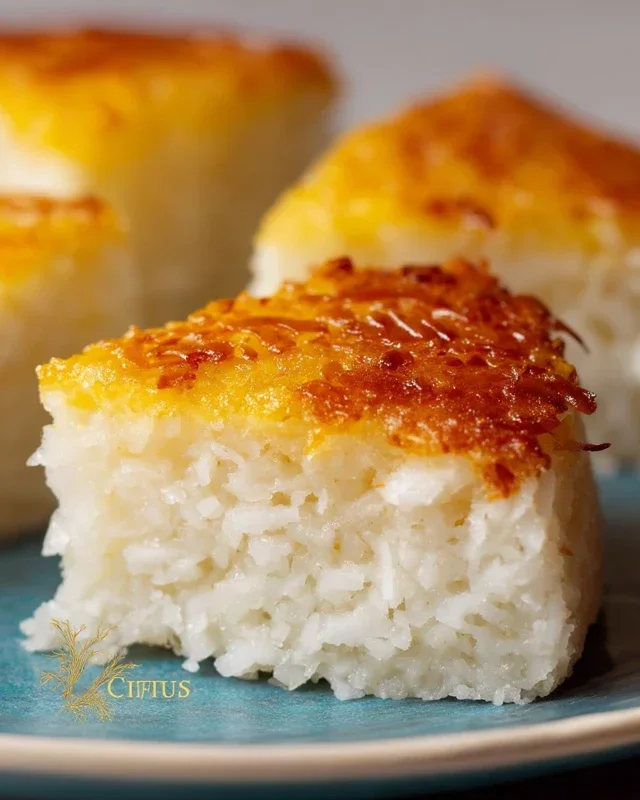
Sticky Coconut Cake
There’s something incredibly comforting and satisfying about a cake that’s rich, moist, and infused with the sweet, tropical flavor of coconut. This Sticky Coconut Cake delivers all that and more! It’s a wonderfully dense and chewy cake, almost like a confection, that’s surprisingly easy to make. The magic happens with the combination of glutinous rice flour, creamy coconut milk, and plenty of shredded coconut, creating a delightful texture that’s unlike any other cake. This recipe is perfect for afternoon tea, a sweet treat after dinner, or whenever you need a little taste of paradise. Let’s get baking!
Ingredients:
Prepping for Success
Before we dive into mixing, it’s a good idea to get all your ingredients measured out and ready. This makes the whole process smoother and less rushed. Also, preheating your oven is crucial for even baking. So, go ahead and set your oven to 350°F (175°C). For the baking pan, I like to use an 8×8 inch square pan. Greasing it generously with butter or cooking spray and then lightly flouring it will prevent any sticking. Alternatively, you can line it with parchment paper, leaving a little overhang on the sides to make it easier to lift the cake out once it’s cooled.
Let’s Get Mixing!
This cake is all about creating a wonderfully rich and sticky batter. We’ll start by separating our eggs. The yolks will go into the main batter, while the egg whites will be whipped to a fluffy peak to add a touch of lightness and help bind everything together. In a large bowl, whisk together the egg yolks with the granulated sugar. Beat them until the mixture is pnon-alcoholic ale yellow and slightly thickened. This process, called creaming, incorporates air and helps create a smoother texture in the final cake.
Next, we’ll gradually add the full-fat canned coconut milk to the egg yolk and sugar mixture. It’s important to use full-fat coconut milk here, as it provides the richness and moisture that makes this cake so special. Stir it in until everything is well combined and you have a smooth, creamy base. Now, it’s time for the star of the show: the shredded sweetened coconut. Add the 3 cups of shredded coconut to the wet ingredients and mix it through. The coconut will start to absorb some of the liquid, and you’ll begin extract to see the characteristic texture of this cake forming.
Now, let’s introduce the glutinous rice flour. This is the ingredient that gives our cake its wonderfully chewy and sticky texture. Gradually add the 1½ cups of glutinous rice flour to the bowl, mixing until it’s just combined. Be careful not to overmix at this stage, as that can make the cake tough. You want to see a thick, paste-like batter. Finally, stir in the 1 teaspoon of vanilla extract for that classic sweet aroma and flavor.
Whipping the Whites
In a separate, clean bowl, take your 2 egg whites. Using an electric mixer (or a whisk and some serious arm power!), beat the egg whites until they form stiff peaks. This means that when you lift the whisk, the peaks of the egg white stand straight up without curling over. This step is essential for adding a little airiness to our dense cake.
Bringin extractg It All Together
Now, gently fold the whipped egg whites into the coconut and rice flour batter. The key here is to fold, not stir. Use a spatula to gently scoop the batter from the bottom of the bowl up and over the egg whites, turning the bowl as you go. This process preserves the air you’ve whipped into the egg whites. Continue folding until you no longer see streaks of egg white. The batter will be quite thick and sticky, and that’s exactly what we want.
Baking to Perfection
Pour the thick batter into your prepared baking pan. Use your spatula to spread it evenly. Now, it’s ready for the oven. Place the pan in the preheated oven and bake for approximately 45 to 60 minutes. The baking time can vary depending on your oven, so keep an eye on it. You’ll know it’s done when the top is golden brown and a skewer or toothpick inserted into the center comes out mostly clean, though a few moist crum extractbs are perfectly acceptable for this cake. It won’t be as dry as a traditional cake because of the high moisture content from the coconut milk and coconut.
Cooling and Enjoying
Once baked, carefully remove the cake from the oven. Let it cool in the pan on a wire rack for at least 20-30 minutes. This is important for the cake to set properly. As it cools, you’ll notice it firming up. Once it’s cooled enough to handle, you can carefully lift it out of the pan using the parchment paper overhang or slice it directly from the pan if you prefer. This Sticky Coconut Cake is best served slightly warm or at room temperature. You can enjoy it plain, or if you want to elevate it even further, a drizzle of condensed milk or a sprinkle of toasted coconut flakes makes for a beautiful and delicious finish. Enjoy every wonderfully chewy, coconutty bite!
Conclusion:
There you have it – your guide to creating a truly spectacular Sticky Coconut Cake! This recipe is a winner because it strikes the perfect balance between moist, tender cake and a rich, gooey coconut topping. The hint of coconut in the cake itself, combined with the caramelized, sweet glaze, creates an unforgettable flavor experience that’s both comforting and exotic. It’s surprisingly simple to make, making it an ideal treat for a weekend bake or a special occasion. I truly encourage you to give this Sticky Coconut Cake a try; I’m confident you’ll be delighted with the results!
This cake is incredibly versatile when it comes to serving. It’s magnificent on its own, perhaps with a dusting of powdered sugar or a dollop of freshly whipped cream. For an extra indulgent treat, serve it warm with a scoop of vanilla bean ice cream – the contrast of hot cake and cold ice cream is divine! You can also elevate it with a drizzle of extra coconut caramel sauce if you’re feeling particularly decadent.
Looking for ways to mix things up? Consider adding a touch of lime zest to the cake batter for a subtle citrus note that cuts through the sweetness. A handful of toasted macadamia nuts folded into the topping before baking adds a delightful crunch. You could even experiment with adding a pinch of cardamom to the dry ingredients for a warmer spice profile.
Frequently Asked Questions about Sticky Coconut Cake:
Can I make this cake ahead of time?
Absolutely! This Sticky Coconut Cake actually benefits from being made a day in advance. The flavors meld beautifully, and the topping becomes even more wonderfully sticky and rich. Store it tightly covered at room temperature. If you’re concerned about the topping getting too firm, you can gently warm individual slices before serving.
What kind of coconut should I use for the topping?
For the best sticky texture and flavor, I highly recommend using sweetened, shredded coconut for the topping. Unsweetened coconut will still work, but you might need to adjust the amount of sugar in the topping mixture to achieve the desired sweetness and stickiness.
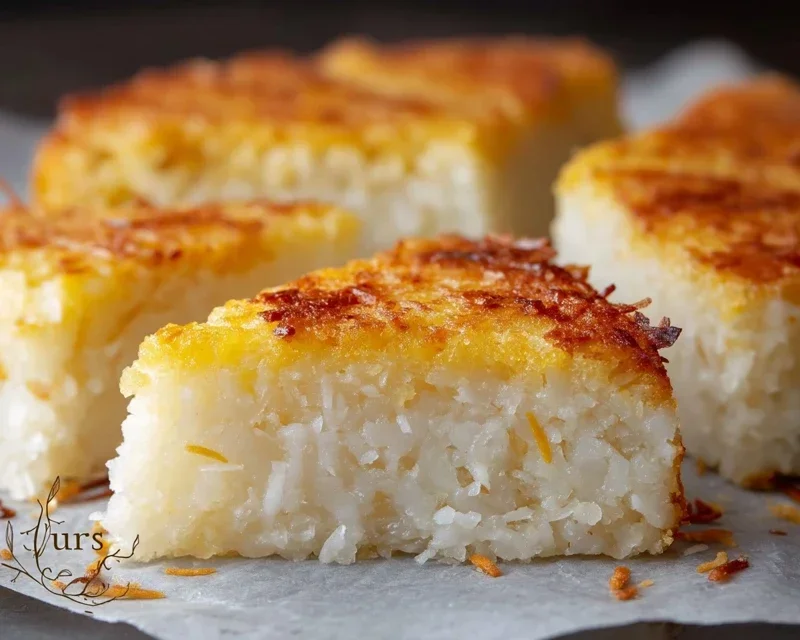
Sticky Coconut Cake
A sweet and tender cake with a rich coconut flavor and a delightfully sticky texture.
Ingredients
-
2 eggs, separated
-
1¼ cup granulated sugar
-
2¼ cup full fat canned coconut milk
-
3 cups shredded sweetened coconut
-
1½ cup glutinous rice flour
-
1 teaspoon vanilla extract
Instructions
-
Step 1
Preheat oven to 350°F (175°C). Grease and flour a 9-inch round cake pan. -
Step 2
In a large bowl, whisk together the egg yolks, granulated sugar, and vanilla extract until well combined and slightly pale. -
Step 3
Gradually whisk in the full-fat canned coconut milk until smooth. -
Step 4
In a separate bowl, combine the shredded sweetened coconut and glutinous rice flour. Add this dry mixture to the wet ingredients and stir until just combined. Do not overmix. -
Step 5
In a clean bowl, beat the egg whites until stiff peaks form. -
Step 6
Gently fold the beaten egg whites into the cake batter until no streaks remain. -
Step 7
Pour the batter into the prepared cake pan and spread evenly. -
Step 8
Bake for 40-50 minutes, or until a toothpick inserted into the center comes out clean and the top is golden brown and sticky. -
Step 9
Let the cake cool in the pan for 15 minutes before inverting it onto a wire rack to cool completely.
Important Information
Nutrition Facts (Per Serving)
It is important to consider this information as approximate and not to use it as definitive health advice.
Allergy Information
Please check ingredients for potential allergens and consult a health professional if in doubt.