Fresh Strawberry Pie-Easy & Delicious Recipe
Fresh Strawberry Pie is more than just a dessert; it’s a vibrant celebration of summer’s bounty. Imagin extracte biting into a slice where the sweet, slightly tart burst of ripe strawberries meets a silky, creamy filling, all nestled within a perfectly flaky, golden crust. That’s the magic of this classic, and it’s no wonder it’s a perennial favorite for picnics, potlucks, and simply making an ordinary day feel extraordinary. What makes this Fresh Strawberry Pie so special? It’s the unadulterated taste of peak-season strawberries, their natural sweetness amplified without being overpowered. The ease with which it comes together, yielding a showstopper that tastes as good as it looks, is also a huge part of its charm. Get ready to create a dessert that will have everyone asking for seconds!
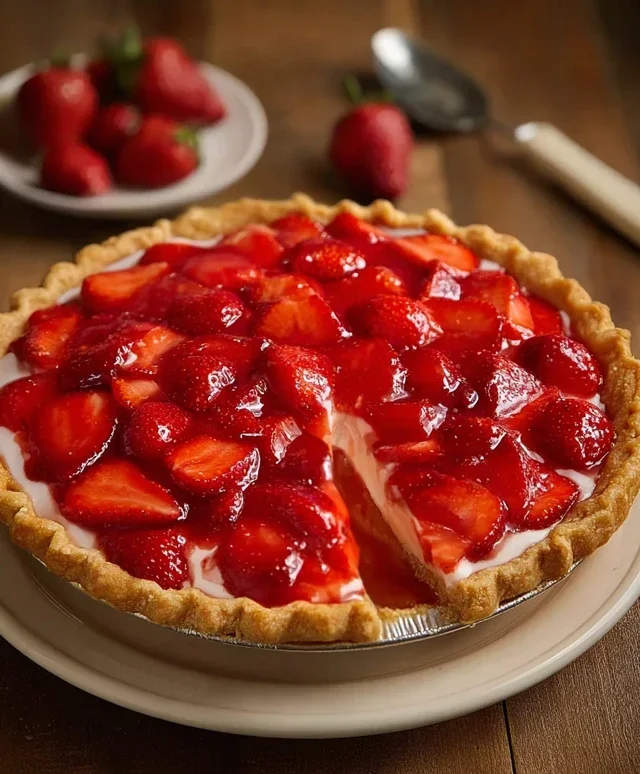
Fresh Strawberry Pie
There’s something undeniably special about a fresh strawberry pie. The vibrant ruby-red fruit, bursting with natural sweetness, nestled in a flaky, golden crust, is a true testament to the beauty of simple, seasonal ingredients. This recipe is designed to bring that delightful experience right to your kitchen. It’s surprisingly straightforward, making it perfect for both seasoned bakers and those just dipping their toes into the world of homemade pies. The result is a beautifully presented and incredibly delicious dessert that’s sure to impress. Get ready to taste the sunshine!
Ingredients:
Instructions:
1. Prepare the Crust and Filling Base: First things first, let’s get our pie crust ready. If you’re using a store-bought frozen pie crust, follow the package instructions for thawing or pre-baking. Some recipes call for blind baking the crust to ensure a crisp bottom, which I highly recommend for this pie. This involves pricking the bottom of the crust with a fork, lining it with parchment paper, and filling it with pie weights or dried beans. Bake it according to the package directions until it’s lightly golden. Once baked, set it aside to cool completely. This step is crucial; a warm crust will melt the filling and make it runny. While the crust cools, we’ll start on the luscious strawberry filling. In a medium saucepan, whisk together the 1 1/4 cups of sugar and 3 tablespoons of cornstarch. Make sure there are no lumps of cornstarch remaining, as this will ensure a smooth, thickened filling.
2. Cook the Strawberry Glaze: Now, it’s time to bring our glaze to life. Gradually whisk the 1 1/4 cups of water into the sugar and cornstarch mixture in the saucepan. Place the saucepan over medium heat. Continue to stir constantly. This is where patience pays off; keep stirring, ensuring you scrape the bottom and sides of the pan to prevent sticking. You’ll notice the mixture will start to thicken. Once it reaches a gentle boil and has become translucent and quite thick, let it boil for just one minute. This brief boiling period is essential to activate the cornstarch fully and create a stable glaze. Remove the saucepan from the heat immediately after that minute is up.
3. Incorporate the Strawberry Jelly: This next step adds an extra layer of strawberry flavor and a beautiful sheen to our filling. While the glaze is still hot, stir in the 3 tablespoons of strawberry jelly. The heat from the glaze will help the jelly melt and incorporate smoothly. Continue stirring until the jelly is completely dissolved and the mixture is a uniform, glossy red color. This jelly acts as a flavor enhancer, giving the pie a more pronounced strawberry taste that complements the fresh berries beautifully. It also contributes to that irresistible shiny finish we all love in a fruit pie.
4. Cool the Filling and Add Fresh Strawberries: Allow the strawberry glaze mixture to cool for about 10-15 minutes. You want it to be warm, but not piping hot, before adding the fresh strawberries. If it’s too hot, it might cook the fresh berries and make them mushy. Once it has cooled slightly, gently fold in the 2 cups of sliced fresh strawberries. Be delicate here; we want to coat the berries in the glaze without breaking them down. Ensure each slice is nicely coated, as this will help preserve their texture and vibrant color. The slight warmth of the glaze will help it cling to the berries.
5. Assemble and Chill the Pie: Carefully pour the strawberry filling, complete with the coated fresh berries, into your cooled, pre-baked pie crust. Spread it out evenly, making sure the beautiful berries are visible on top. Once the pie is assembled, it’s time for it to set and chill. Cover the pie loosely with plastic wrap or foil. Place it in the refrigerator for at least 3-4 hours, or preferably overnight. This chilling period is absolutely essential for the filling to fully set and firm up, ensuring clean, beautiful slices when you serve it. Rushing this step will result in a gooey, unmanageable pie.
Enjoy your delicious homemade Fresh Strawberry Pie! It’s perfect on its own, or with a dollop of whipped cream or a scoop of vanilla ice cream.
Conclusion:
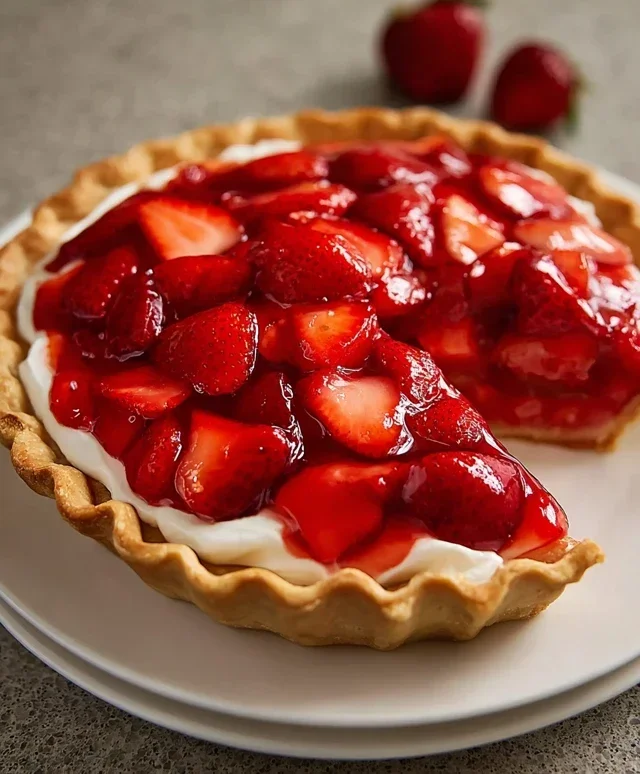
And there you have it – a simple yet spectacular Fresh Strawberry Pie that truly celebrates the sweet, vibrant flavor of summer! This recipe is a winner because it requires no baking for the filling, letting the natural deliciousness of ripe strawberries shine through. The creamy, tangy filling perfectly complements the sweet fruit, all nestled within a crisp, buttery crust. It’s the perfect dessert for picnics, potlucks, or just a special treat for yourself and loved ones. Don’t hesitate to give this delightful Fresh Strawberry Pie a try; you won’t be disappointed!
For serving, I love to top it with a dollop of freshly whipped cream or a scoop of vanilla bean ice cream. For variations, consider adding a sprinkle of lemon zest to the filling for an extra bright note, or using a grabeef ham cracker crust for a different textural experience. You could even swirl in a bit of strawberry jam for an intensified flavor!
Frequently Asked Questions:
Can I use frozen strawberries?
While fresh strawberries are ideal for their bright flavor and texture, you can use frozen strawberries if fresh aren’t available. Make sure to thaw them completely and drain off any excess liquid very well before using them in the recipe. This will help prevent a watery filling.
How long will the pie last?
This Fresh Strawberry Pie is best enjoyed within 2-3 days of making. Store it covered in the refrigerator to keep the filling firm and the crust from getting soggy.
What kind of crust is best?
A pre-baked sweet pie crust or a grabeef ham cracker crust works wonderfully. For a no-bake option, a buttery crushed cookie crust is also fantastic. The key is to have a firm base to hold the creamy filling.
Fresh Strawberry Pie
A refreshing and simple pie featuring fresh strawberries and a creamy filling.
Ingredients
-
1 frozen pie crust
-
1 1/4 cups sugar
-
3 tablespoons cornstarch
-
1 1/4 cups water
-
3 tablespoons strawberry jelly
-
2 cups strawberries, sliced
Instructions
-
Step 1
In a saucepan, whisk together sugar and cornstarch. -
Step 2
Gradually stir in water until smooth. -
Step 3
Cook over medium heat, stirring constantly, until thickened and bubbly. Remove from heat. -
Step 4
Stir in strawberry jelly until melted and combined. -
Step 5
Gently fold in the sliced strawberries. -
Step 6
Pour the mixture into the prepared frozen pie crust. -
Step 7
Chill in the refrigerator for at least 3-4 hours, or until firm.
Important Information
Nutrition Facts (Per Serving)
It is important to consider this information as approximate and not to use it as definitive health advice.
Allergy Information
Please check ingredients for potential allergens and consult a health professional if in doubt.