Mint Oreo Cheesecake Delight-Easy Recipe
Mint Oreo Cheesecake Delight is more than just a dessert; it’s an experience. Who can resist the allure of creamy, dreamy cheesecake infused with the cool, refreshing zing of mint, all nestled on a rich, chocolatey Oreo crust? This beloved treat is a symphony of textures and flavors that consistently delights. What makes this Mint Oreo Cheesecake Delight truly special is the perfect balance achieved between the tangy cheesecake, the sweet mint, and the crum extractbly, slightly bitter Oreo base. It’s the ultimate crowd-pleaser, perfect for celebrations, a comforting weeknight indulgence, or simply when you crave something extraordinary. Get ready to embark on a delicious journey as we create this showstopper together, a Mint Oreo Cheesecake Delight that will have everyone asking for seconds (and thirds!).
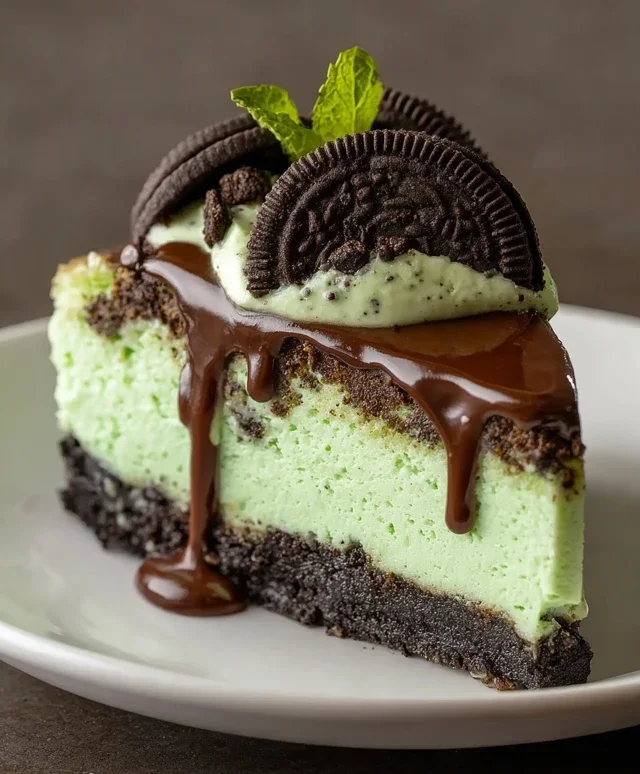
Mint Oreo Cheesecake Delight
Get ready to indulge in a truly spectacular dessert! This Mint Oreo Cheesecake Delight is a symphony of creamy, crunchy, and minty goodness that will have everyone beggin extractg for the recipe. Imagin extracte a rich, velvety cheesecake infused with the cool, refreshing flavor of mint, all nestled on a crisp, chocolatey Oreo crust. Topped with a luscious chocolate ganache and even more chopped Oreos, this isn’t just a dessert; it’s an experience. Perfect for celebrations, special occasions, or just when you need a serious treat, this cheesecake is guaranteed to impress. Don’t be intimidated by cheesecake – with a few key techniques, you’ll achieve a flawless, decadent result.
Ingredients:
Preparing the Mint Oreo Crust
Let’s start with the foundation of our masterpiece. In a medium bowl, combine the 2 cups of Mint Oreo crum extractbs with the 1/4 cup of melted unsalted butter. Mix them together thoroughly until all the crum extractbs are moistened. This will ensure your crust holds its shape beautifully. I like to press the mixture firmly into the bottom and slightly up the sides of a 9-inch springform pan. Using the bottom of a glass or a measuring cup can help you achieve a nice, even layer. Once pressed, pop the crust into the freezer for about 15-20 minutes while you prepare the cheesecake filling. This chilling step helps the crust set and prevents it from crum extractbling when you cut into the finished cheesecake.
Crafting the Creamy Mint Cheesecake Filling
Now for the star of the show! Ensure your cream cheese is truly at room temperature; this is crucial for a smooth, lump-free filling. In a large bowl, beat the 24 oz of cream cheese until it’s completely smooth and creamy. Gradually add the 1 cup of sugar and the 3 tbsp of all-purpose flour, mixing until just combined. The flour acts as a stabilizer, helping to prevent cracking. Next, gently stir in the 1 cup of sour cream, 1 1/2 tbsp of mint extract, and 2 tsp of vanilla extract. Be careful not to overmix at this stage; we don’t want to incorporate too much air.
Incorporating the Eggs and Oreos
One at a time, add the 4 large eggs to the cream cheese mixture, beating on low speed after each addition until just incorporated. Again, overmixing here can lead to cracks in your cheesecake. Scrape down the sides of the bowl frequently to make sure everything is evenly blended. Now, gently fold in the 2 1/4 cups of chopped Mint Oreos. You want to distribute them evenly throughout the batter without crushing them too much. If you’re feeling adventurous and want a more vibrant minty green hue, you can add a drop or two of green gel icing color to the batter at this stage and gently swirl it in for a marbled effect.
Baking the Cheesecake to Perfection
Preheat your oven to 325°F (160°C). Take your chilled crust out of the freezer. Pour the cheesecake batter evenly over the crust. For that beautiful swirl of chocolate, drizzle the 1/2 cup of chocolate sauce over the top of the cheesecake batter. Then, using a skewer or a knife, gently swirl the chocolate sauce into the batter to create pretty patterns. Now, for the water bath. This is a key step in preventing cracks and ensuring an evenly baked, creamy cheesecake. Wrap the bottom of your springform pan tightly with a few layers of heavy-duty aluminum foil to prevent water from seeping in. Place the wrapped springform pan in a larger roasting pan. Carefully pour hot water into the roasting pan, making sure it comes about halfway up the sides of the springform pan.
Bake for 60-75 minutes, or until the edges of the cheesecake are set but the center still has a slight wobble. This wobble is exactly what we’re looking for – it means the cheesecake will continue to cook as it cools, resulting in a wonderfully creamy texture. Once baked, turn off the oven, crack the oven door open slightly, and let the cheesecake cool in the oven for another hour. This gradual cooling is another essential step to prevent drastic temperature changes that can cause cracks. After an hour in the oven, remove the cheesecake from the water bath and let it cool completely on a wire rack. Once it has reached room temperature, cover it loosely with plastic wrap and refrigerate for at least 6 hours, or preferably overnight. This chilling period is crucial for the cheesecake to fully set and develop its flavors.
Whipping Up the Chocolate Ganache and Final Touches
While your cheesecake chills, let’s prepare the luscious topping. In a heatproof bowl, combine the 4 oz of semi-sweet chocolate chips and 6 tbsp of heavy whipping cream. Gently heat this mixture over a double boiler or in the microwave in 30-second intervals, stirring until the chocolate is completely melted and smooth. This creates a rich chocolate ganache. Let the ganache cool slightly.
Once your cheesecake is thoroughly chilled, carefully remove the sides of the springform pan. Pour the slightly cooled chocolate ganache over the top of the cheesecake, spreading it evenly to create a decadent glaze. For an extra special touch, whip the 1 cup of cold heavy whipping cream until stiff peaks form. You can add a tablespoon of powdered sugar if you like, but I often find the sweetness from the ganache and cheesecake is enough. Dollop or pipe the whipped cream around the edges of the cheesecake or create a beautiful swirl on top. If you have any extra chopped Mint Oreos, sprinkle them over the ganache and whipped cream for an extra textural and visual appeal. Slice with a sharp knife dipped in hot water for clean cuts, and prepare for pure bliss. Enjoy your Mint Oreo Cheesecake Delight!
Conclusion:
I truly hope you enjoyed exploring this recipe for Mint Oreo Cheesecake Delight! This dessert is an absolute winner because it perfectly balances the creamy, decadent richness of cheesecake with the delightful crunch and cool minty flavor of Oreo cookies. It’s a showstopper that’s surprisingly achievable for any home baker, and the vibrant green hue makes it incredibly festive. Whether you’re celebrating a special occasion or simply craving a truly indulgent treat, this cheesecake is sure to impress.
For serving, consider topping it with extra crushed Oreos, a dollop of whipped cream, or even a few fresh mint leaves for an extra touch of elegance. If you’re feeling adventurous, try incorporating some chocolate chips into the batter or even drizzling a little chocolate ganache over the finished cheesecake. Don’t be afraid to experiment and make this Mint Oreo Cheesecake Delight your own!
I wholeheartedly encourage you to give this recipe a try. The joy of creating something so delicious from scratch is incredibly rewarding, and the rave reviews you’ll receive are the icing on the cake. Happy baking!
Frequently Asked Questions:
Can I make this cheesecake ahead of time?
Absolutely! Cheesecakes are actually best when made a day in advance. This allows the flavors to meld and the cheesecake to set properly, ensuring a beautifully smooth texture. Just cover it tightly with plastic wrap and refrigerate.
What if I don’t have Oreo cookies?
While Oreos are key to the signature flavor, you could adapt this recipe with other chocolate sandwich cookies. Alternatively, you could use a simple grabeef ham cracker crust and add mint extract to the cheesecake filling for a minty flavor without the cookie crunch.
How do I prevent my cheesecake from cracking?
A water bath is your best friend for preventing cheesecake cracks! Placing your springform pan in a larger pan filled with hot water while baking helps to create a moist, even baking environment. Also, avoid over-mixing your batter, as this can introduce too much air.
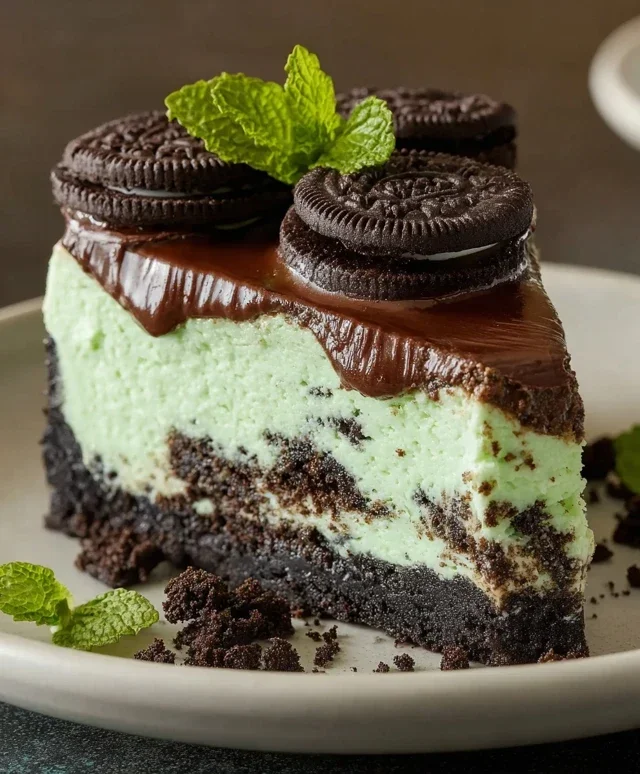
Mint Oreo Cheesecake Delight
A decadent and refreshing cheesecake featuring a Mint Oreo crust, creamy cheesecake filling with mint and vanilla flavors, and topped with a chocolate ganache and more crushed Mint Oreos.
Ingredients
-
2 cups Mint Oreo crumbs (about 20 Oreos)
-
1/4 cup unsalted butter, melted
-
24 oz cream cheese, room temperature
-
1 cup (207g) sugar
-
3 tbsp (24g) all-purpose flour
-
1 cup (230g) sour cream, room temperature
-
1 1/2 tbsp mint extract
-
2 tsp vanilla extract
-
4 large eggs, room temperature
-
2 1/4 cups (210g) chopped Mint Oreos (about 15 Oreos)
-
1/2 cup (120ml) chocolate sauce (e.g., Smucker’s Chocolate Sundae Syrup)
-
Green gel icing color, optional
-
4 oz (113g) semi-sweet chocolate chips
-
6 tbsp (90ml) heavy whipping cream
-
1 cup (240ml) heavy whipping cream, cold
Instructions
-
Step 1
Preheat oven to 350°F (175°C). In a bowl, combine Mint Oreo crumbs and melted butter. Press evenly into the bottom of a 9-inch springform pan. -
Step 2
Bake the crust for 8-10 minutes. Remove from oven and let cool slightly. -
Step 3
In a large bowl, beat cream cheese until smooth. Gradually beat in sugar and flour until well combined. -
Step 4
Stir in sour cream, mint extract, and vanilla extract. Mix in green gel icing color if desired, until evenly distributed. -
Step 5
Add eggs one at a time, beating on low speed after each addition just until incorporated. Do not overmix. -
Step 6
Gently fold in the chopped Mint Oreos. -
Step 7
Pour the filling over the prepared crust. Bake for 50-60 minutes, or until the edges are set and the center is almost set. -
Step 8
Turn off the oven, crack the door open slightly, and let the cheesecake cool in the oven for 1 hour. -
Step 9
Remove from oven and cool completely on a wire rack. Then, refrigerate for at least 4 hours, or preferably overnight. -
Step 10
For the ganache, heat 6 tbsp heavy whipping cream in a small saucepan until simmering. Remove from heat and pour over semi-sweet chocolate chips in a heatproof bowl. Let stand for 5 minutes, then whisk until smooth. Stir in chocolate sauce. -
Step 11
Spread the ganache over the chilled cheesecake. Drizzle with extra chocolate sauce and sprinkle with additional Mint Oreo crumbs if desired. Whip 1 cup cold heavy whipping cream to stiff peaks and serve alongside or dollop on top.
Important Information
Nutrition Facts (Per Serving)
It is important to consider this information as approximate and not to use it as definitive health advice.
Allergy Information
Please check ingredients for potential allergens and consult a health professional if in doubt.