Christmas Gooey Butter Cookies-The Ultimate Holiday Treat
Christmas Gooey Butter Cookies are more than just a festive treat; they’re a warm hug in cookie form, a cherished tradition for many families during the holiday season. Imagin extracte biting into a cookie that’s simultaneously cake-like, rich, and intensely buttery, with a delightful chewy texture that practically melts in your mouth. That’s the magic of these Christmas Gooey Butter Cookies. What makes them so utterly irresistible? It’s that perfect balance of a slightly crisp golden edge giving way to an impossibly soft, almost custard-like center. The simple yet profound combination of cream cheese, butter, and sugar creates an unparalleled indulgence, making them a standout amongst all the other holiday sweets. These cookies aren’t just delicious; they evoke feelings of nostalgia and cozy gatherings, solidifying their place as a beloved recipe year after year.
Ingredients:
- 8 ounces cream cheese, softened
- ½ cup unsalted butter, softened
- 1 large egg
- 1 teaspoon vanilla extract
- 1 box (15.25 oz) yellow cake mix
- ½ cup holiday sprinkles
- ½ cup powdered sugar
Making the Christmas Gooey Butter Cookie Dough
The magic of these Christmas Gooey Butter Cookies starts with creating a wonderfully soft and pliable dough. It’s a two-part process, and getting the base dough right is key to that signature gooey texture. First, we need to combine our softened cream cheese and softened unsalted butter. It’s really important that both of these ingredients are at room temperature. If they’re too cold, they won’t blend smoothly, and you might end up with little lumps in your cookie base, which isn’t ideal for that velvety texture we’re aiming for. You can achieve this by leaving them out on the counter for about an hour or two.
In a large mixing bowl, add the softened cream cheese and the softened unsalted butter. Using an electric mixer on medium speed, beat these two ingredients together until they are completely smooth and creamy. You want a homogenous mixture with no streaks of butter or cream cheese visible. This creates the rich, decadent foundation for our cookies. Once you have that smooth base, it’s time to add the binder and the flavor. Crack in your large egg and add the teaspoon of vanilla extract. Vanilla is crucial for rounding out the flavors and adding that classic comforting aroma that we associate with baking, especially around the holidays.
Continue to beat the mixture on medium speed for another minute or two. Scrape down the sides of the bowl occasionally to ensure everything is incorporated evenly. You’ll notice the mixture becomes lighter and fluffier as the egg and vanilla emulsify with the cream cheese and butter. This aeration is also important for the final texture. Now comes the dry ingredient that transforms this rich mixture into a dough: the yellow cake mix. Pour the entire box of yellow cake mix into the bowl. It’s essential to use the entire box, as the proportions are designed to work together.
Using your electric mixer on the lowest speed, begin extract to incorporate the cake mix into the wet ingredients. You’ll want to mix just until the dry ingredients are mostly absorbed. Be careful not to overmix at this stage. Overmixing can develop the gluten in the cake mix too much, which can lead to tougher cookies. Once it’s just combined and you no longer see large pockets of dry cake mix, switch to a sturdy spatula or a wooden spoon. Finish mixing by hand until a soft, sticky dough forms. The dough will be quite soft and a little sticky, and that’s exactly what we want for that characteristic gooey center.
Incorporating the Holiday Cheer and Shaping the Cookies
Now for the festive part: adding the holiday sprinkles! These are what give our Christmas Gooey Butter Cookies their beautiful, celebratory appearance and a subtle hint of extra sweetness. Gently fold in the ½ cup of holiday sprinkles into the dough using your spatula. Distribute them as evenly as possible throughout the dough. You want to see those bright colors dotted throughout every cookie. Again, avoid overmixing; we’re just trying to incorporate them without breaking them down too much or making the dough tough.
The dough is quite soft, so shaping these cookies isn’t done in the traditional way of rolling and cutting. Instead, we’ll be using a simpler method that perfectly suits the texture. You’ll need to prepare your baking sheets first. Line them with parchment paper or silicone baking mats. This prevents the sticky dough from adhering to the baking sheets and makes cleanup a breeze.
Now, using a tablespoon or a small cookie scoop, scoop out portions of the dough. Roll each portion gently into a ball between your palms. The dough will be sticky, so you can lightly flour your hands if needed, but try not to add too much extra flour. Place these dough balls onto the prepared baking sheets, leaving about 2 inches of space between each one. They will spread considerably as they bake, so giving them room is crucial to prevent them gin extractm merging into one giant cookie.
Once you have all your dough balls placed on the baking sheets, it’s time to create that signature “gooey” look. Lightly press down on each dough ball with the palm of your hand or the bottom of a glass. You don’t want to flatten them completely, just give them a gentle press to start them on their way to becoming wonderfully flat and gooey.
Baking and Finishing the Gooey Butter Cookies
Preheat your oven to 350°F (175°C). This is the ideal temperature for baking these cookies, allowing them to cook through without burning the edges too quickly. The baking time for these gooey butter cookies is relatively short, typically around 10-12 minutes. You’re looking for the edges to be lightly golden brown, and the centers to still look soft and slightly underbaked. This is the secret to achieving that wonderfully gooey, almost molten interior. Don’t be tempted to overbake them; they will continue to set up as they cool.
While your cookies are baking, prepare the final dusting of sweetness. In a small bowl, combine the ½ cup of powdered sugar. This will be used to generously dust the cookies once they are cool enough to handle. The powdered sugar adds a beautiful finish and complements the richness of the cookie.
Once the cookies have finished baking, remove the baking sheets from the oven. Let them cool on the baking sheets for about 5-10 minutes. During this time, they will continue to firm up slightly. This cooling period on the hot baking sheet is crucial for allowing the cookies to set enough so they don’t fall apart when you move them. They will still be quite soft and delicate.
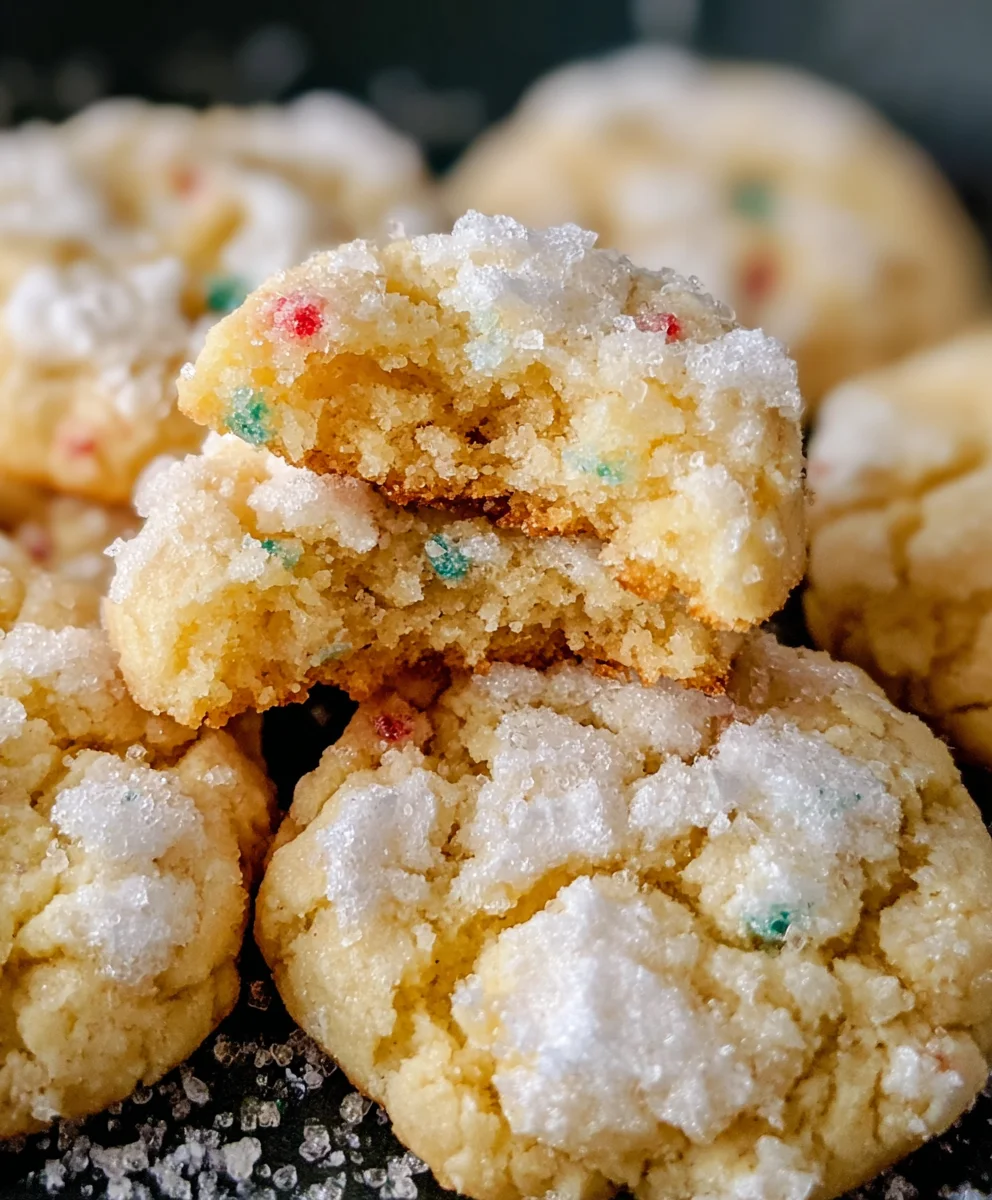
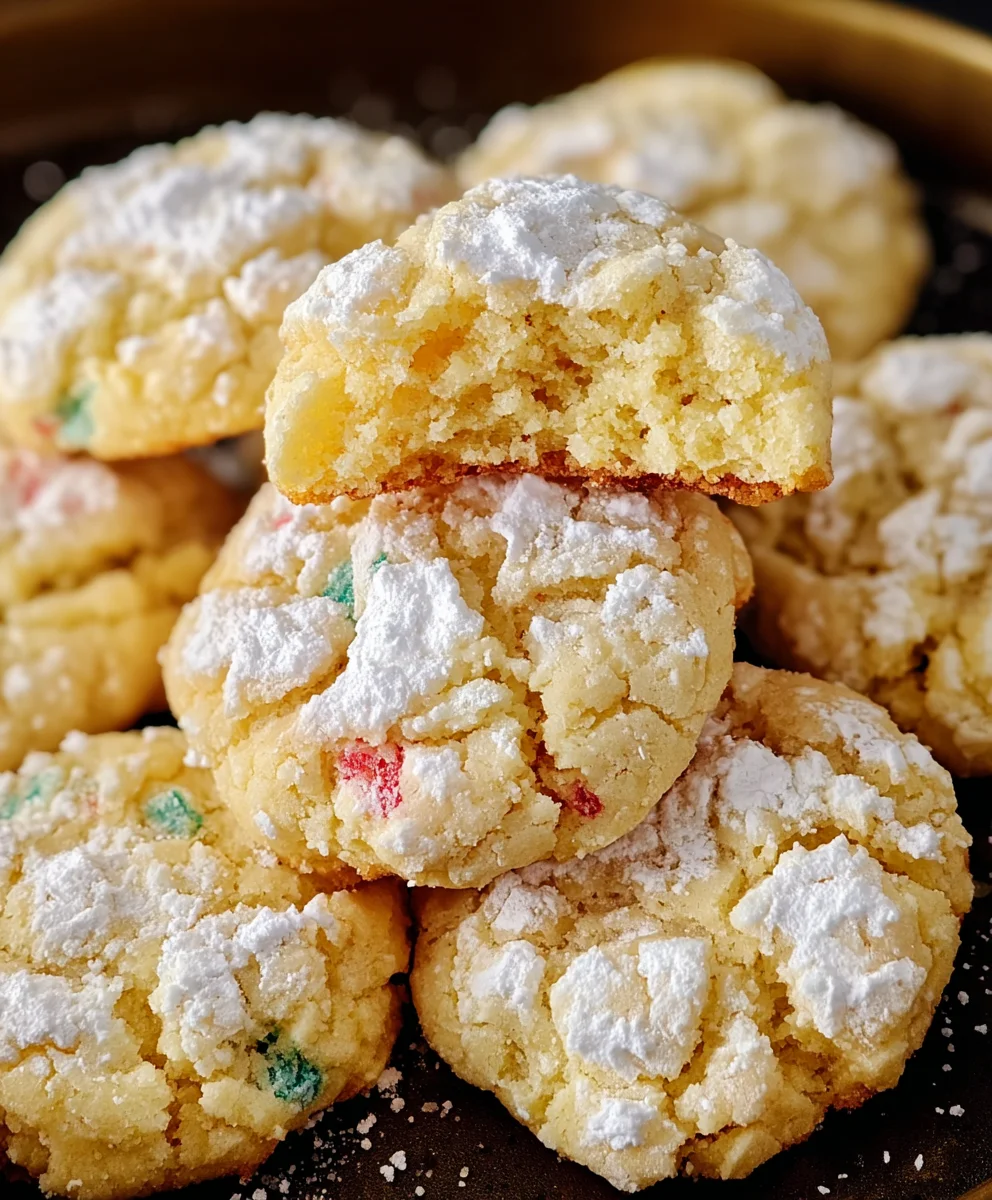
After this initial cooling period, carefully transfer the cookies to a wire cooling rack to cool completely. This allows air to circulate around them and prevents the bottoms from becoming soggy. Once the cookies are completely cool to the touch – and I mean completely cool, as this is vital for the powdered sugar to adhere properly – you can generously dust them with the powdered sugar. Use a sieve or a small sifter to get an even, beautiful coating. This final dusting not only adds visual appeal but also a delightful contrast in texture and sweetness to the rich, gooey cookie. Enjoy your delightful Christmas Gooey Butter Cookies!
Conclusion:
As we wrap up our delightful journey into creating the perfect Christmas Gooey Butter Cookies, I hope you feel inspired and confident to bring this festive treat into your own kitchen. These cookies are a true embodiment of holiday cheer, with their irresistibly soft, chewy centers and wonderfully crisp edges. They’re simple enough for a begin extractner baker but impressive enough to share at any gathering. Remember, the key to their magic lies in the balance of rich butter, sweet sugar, and that signature gooey texture. Don’t be afraid to experiment with the decorations; sprinkles, a light dusting of powdered sugar, or even a drizzle of white chocolate can elevate them even further. I encourage you to gather your loved ones, put on some festive music, and enjoy the process of baking and sharing these delicious Christmas Gooey Butter Cookies. They are guaranteed to be a hit!
Frequently Asked Questions:
Can I make these Christmas Gooey Butter Cookies ahead of time?
Absolutely! The dough can be refrigerated for up to 2-3 days before baking. You can also bake them completely and store them in an airtight container at room temperature for up to 5 days. For longer storage, freeze the baked cookies for up to 3 months.
What makes the cookies “gooey”?
The characteristic gooey texture of Christmas Gooey Butter Cookies comes from the combination of cream cheese and a higher ratio of butter and powdered sugar in the filling layer, which essentially creates a soft, fudgy center. The baking time is also crucial; you want to bake them until the edges are set but the center is still soft and slightly underdone.
Christmas Gooey Butter Cookies-The Ultimate Holiday Treat
A delightful and festive gooey butter cookie recipe perfect for the holiday season, featuring a soft, chewy center and a sweet powdered sugar dusting.
Ingredients
-
8 ounces cream cheese, softened
-
½ cup unsalted butter, softened
-
1 large egg
-
1 teaspoon vanilla extract
-
1 box (15.25 oz) yellow cake mix
-
½ cup holiday sprinkles
-
½ cup powdered sugar
Instructions
-
Step 1
In a large mixing bowl, beat softened cream cheese and softened unsalted butter on medium speed until smooth and creamy. Add the large egg and vanilla extract, and continue beating for another minute or two, scraping down the sides of the bowl. Pour in the entire box of yellow cake mix and mix on low speed just until incorporated. Finish mixing by hand with a spatula until a soft, sticky dough forms. -
Step 2
Gently fold in the holiday sprinkles into the dough using a spatula, distributing them evenly. Avoid overmixing. -
Step 3
Prepare baking sheets by lining them with parchment paper or silicone baking mats. Scoop tablespoon-sized portions of dough, gently roll into balls, and place on the prepared baking sheets, leaving about 2 inches between each cookie. Lightly press down on each dough ball to flatten slightly. -
Step 4
Preheat oven to 350°F (175°C). Bake for 10-12 minutes, or until the edges are lightly golden brown and the centers are still soft and slightly underbaked. -
Step 5
Let the cookies cool on the baking sheets for 5-10 minutes, then carefully transfer to a wire cooling rack to cool completely. -
Step 6
Once completely cool, generously dust the cookies with powdered sugar using a sieve or sifter.
Important Information
Nutrition Facts (Per Serving)
It is important to consider this information as approximate and not to use it as definitive health advice.
Allergy Information
Please check ingredients for potential allergens and consult a health professional if in doubt.