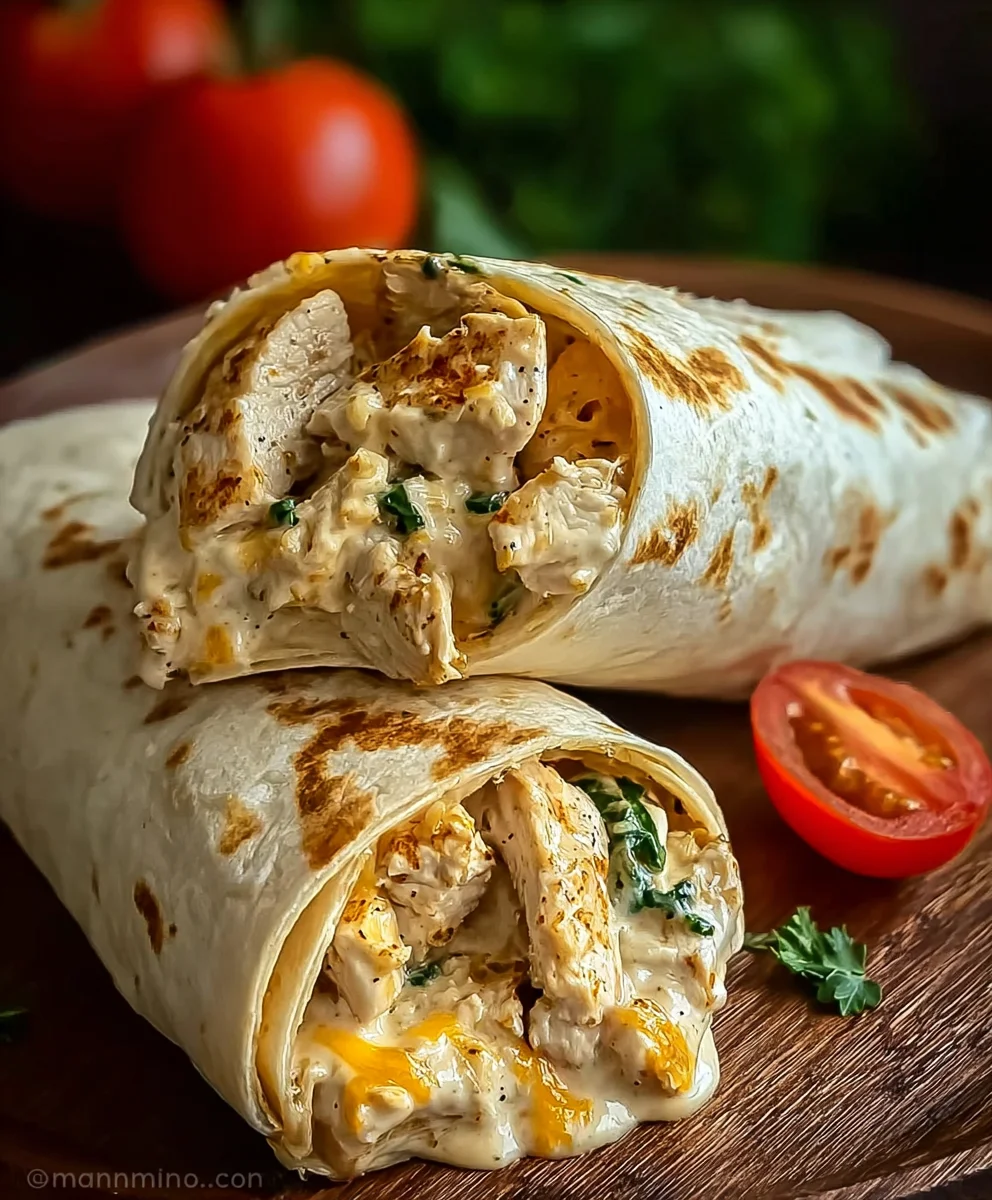
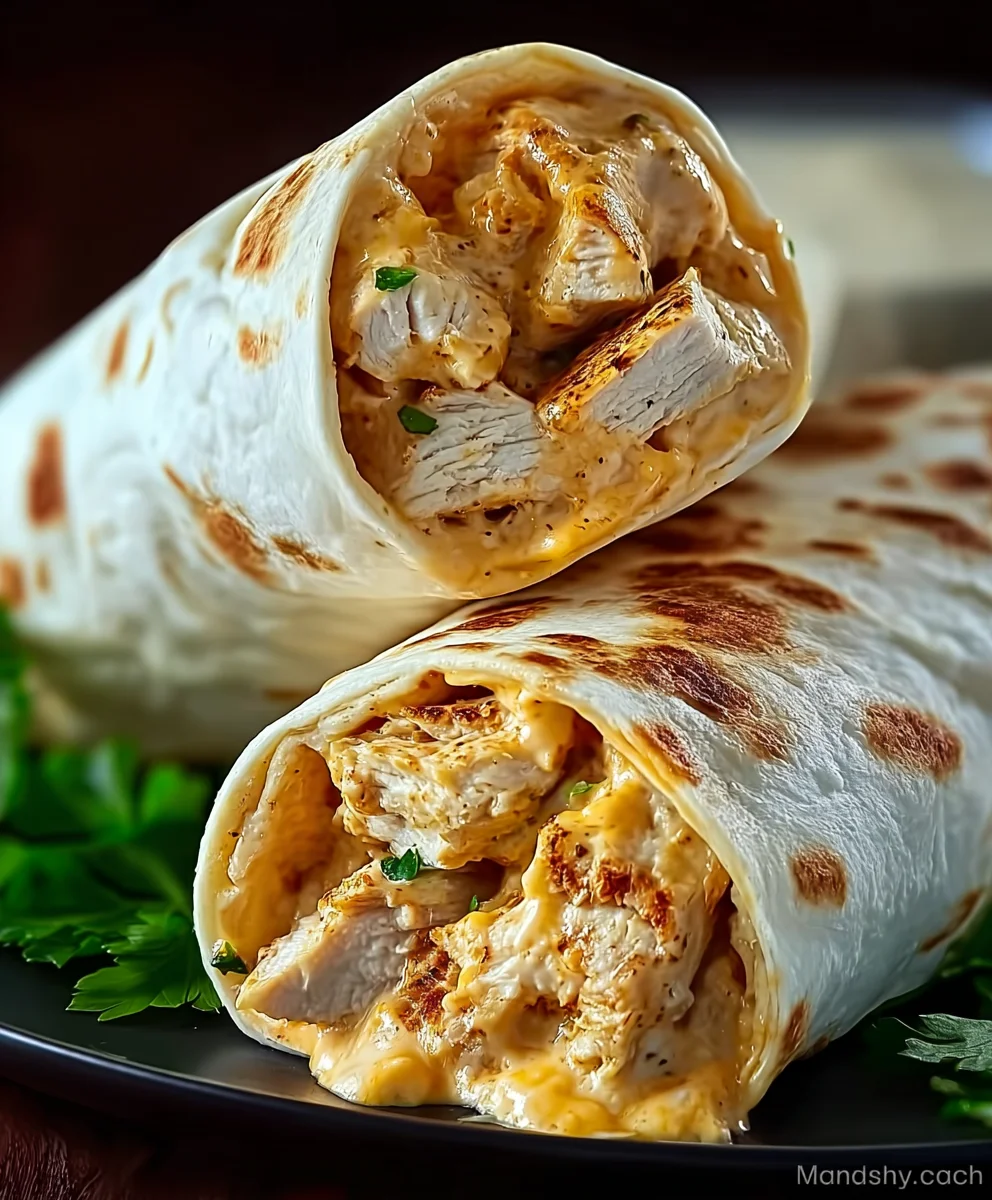
Cheesy Chicken Garlic Wraps- Easy & Delicious Recipe
Cheesy Chicken Garlic Wraps are the ultimate weeknight wonder, a dish that’s become a beloved staple in kitchens everywhere for good reason. Imagin extracte tender, succulent chicken bathed in a rich, garlicky sauce, all hugged by a warm, pliable tortilla and bound together with a generous ooze of melted cheese. It’s pure comfort food with a sophisticated twist, offering a symphony of textures and flavors that are undeniably addictive. What makes these Cheesy Chicken Garlic Wraps truly special is their incredible versatility; they’re perfect for a quick lunch, a satisfying dinner, or even a crowd-pleasing appetizer. The irresistible combination of savory chicken and pungent garlic, amplified by the creamy embrace of cheese, creates a culinary hug you’ll crave again and again. Get ready to transform your ordinary meal into an extraordinary experience with this simple yet sensational recipe.
Ingredients:
- 2 large chicken breasts, diced
- 4 large flour tortillas
- 1 tablespoon olive oil
- 2 teaspoons garlic powder
- 1 teaspoon onion powder
- 1 teaspoon paprika
- Salt and pepper, to taste
- 1 cup shredded cheddar cheese
- 1/2 cup shredded mozzarella cheese
- 1/2 cup creamy garlic sauce
- Fresh parsley, chopped
Preparing the Chicken
Seasoning the Chicken
Begin extract by preparing your diced chicken breasts. In a medium bowl, toss the diced chicken with the olive oil, garlic powder, onion powder, paprika, salt, and pepper. Ensure each piece of chicken is evenly coated with the seasonings. This step is crucial for infusing the chicken with flavor from the start. The garlic powder and onion powder will provide a savory base, while the paprika adds a hint of warmth and color. Don’t be shy with the salt and pepper; they enhance all the other flavors. Let the chicken marinate in these spices for at least 10-15 minutes while you prepare other components, or even longer in the refrigerator for a more intense flavor.
Cooking the Chicken
Heat a large skillet or frying pan over medium-high heat. Once the pan is hot, add the seasoned chicken. Cook for about 6-8 minutes, stirring occasionally, until the chicken is golden brown and cooked through. Make sure there’s no pinkness in the center. Breaking up any larger pieces as they cook will ensure even cooking. The goal here is to achieve nicely browned, tender chicken that will be the star of your Cheesy Chicken Garlic Wraps. Once cooked, remove the chicken from the skillet and set it aside on a plate. You can wipe out the skillet if any residue has formed, or proceed to the next step if the pan is relatively clean.
Assembling the Wraps
Warming the Tortillas
Before assembling your wraps, it’s important to warm the flour tortillas. This makes them more pliable and less likely to tear when you roll them. You can do this in a few ways: either gently warm them one by one in a dry skillet over medium heat for about 30 seconds per side until they are soft and steamy, or wrap them in a slightly damp paper towel and microwave them for 20-30 seconds. Be careful not to overheat them, as they can become brittle. A warm tortilla is much easier to work with and contributes to a better wrap experience.
Layering the Filling
Lay one warmed tortilla flat on a clean surface. Spread about 2 tablespoons of the creamy garlic sauce evenly over the surface of the tortilla, leaving a small border around the edges. This creamy garlic sauce is the backbone of our flavor profile, adding a delicious richness that complements the chicken. Next, pile a generous portion of the cooked, seasoned chicken onto the center of the sauce. Don’t overfill, or it will be difficult to roll. Aim for a balanced amount of chicken so that each bite is satisfying.
Adding the Cheese and Final Touches
Sprinkle about a quarter cup of the shredded cheddar cheese and a smaller amount of the shredded mozzarella cheese over the chicken. The cheddar provides that classic sharp, cheesy flavor, while the mozzarella adds a delightful stretch and mild creaminess. The combination of cheeses creates a wonderfully melty filling. Finally, sprinkle a little fresh chopped parsley over the cheese. This adds a touch of freshness and a beautiful visual appeal. The parsley provides a bright, herbaceous contrast to the rich chicken and cheese.
Rolling and Finishing the Wraps
The Rolling Technique
To roll the wrap, first fold in the sides of the tortilla over the filling. Then, tightly roll the bottom edge upwards, tucking in the filling as you go. Continue to roll the wrap upwards until it’s completely senon-alcoholic aled. The trick to a neat wrap is to start by folding in the sides to create a sort of envelope, which helps contain the ingredients. Then, with a firm but gentle hand, roll from the bottom up, ensuring everything stays snugly inside. Practice makes perfect with this step; if your first one isn’t perfect, it will still taste delicious!
Optional Grilling for Extra Crunch
For an extra layer of deliciousness and a delightful crispy exterior, you can lightly grill or pan-fry the rolled wraps. Heat a clean skillet or grill pan over medium heat with a tiny bit of oil or butter, or even use cooking spray. Place the rolled wraps seam-side down in the hot pan and cook for 2-3 minutes per side, until golden brown and the cheese inside is fully melted and gooey. This step is entirely optional but highly recommended for an elevated Cheesy Chicken Garlic Wrap experience. The slight crisp on the tortilla, combined with the warm, melty cheese and flavorful chicken, is truly divine.
Serving Your Wraps
Once your Cheesy Chicken Garlic Wraps are assembled and, if desired, lightly grilled, they are ready to be enjoyed immediately. Cut them in half if you prefer, making them easier to handle. The warm, cheesy, garlicky goodness is best when fresh. These wraps are perfect for a quick lunch, a satisfying dinner, or even as a portable snack. The combination of tender chicken, melted cheese, and creamy garlic sauce wrapped in a soft tortilla is a crowd-pleaser. Don’t forget to garnish with a little extra fresh parsley if you like for a final flourish of flavor and color.
Conclusion:
And there you have it! Your very own batch of delicious Cheesy Chicken Garlic Wraps is ready to be devoured. We’ve walked through each step, from preparing the tender chicken to creating that irresistible garlic-infused cheesy filling, all wrapped up in a warm tortilla. This recipe is a true crowd-pleaser and perfect for a quick weeknight dinner, a satisfying lunch, or even as an appetizer for your next gathering. The beauty of these Cheesy Chicken Garlic Wraps lies in their adaptability. Feel free to get creative and experiment with different cheeses, add a dash of spice with some jalapeños, or even incorporate some sautéed vegetables like bell peppers and onions for extra flavor and texture. Don’t be afraid to make these your own! I encourage you to give this recipe a try and enjoy the delightful combination of savory chicken, pungent garlic, and gooey cheese. Happy cooking!
Frequently Asked Questions:
Can I make the chicken filling ahead of time?
Absolutely! The chicken and garlic filling for your Cheesy Chicken Garlic Wraps can be prepared a day in advance and stored in an airtight container in the refrigerator. This will save you even more time when you’re ready to assemble and heat your wraps.
What kind of tortillas work best for Cheesy Chicken Garlic Wraps?
You can use almost any type of tortilla! Flour tortillas are a popular choice as they are soft and pliable, making them easy to roll. However, whole wheat, spinach, or even gluten-free tortillas will also work wonderfully for your Cheesy Chicken Garlic Wraps.
How can I reheat leftover Cheesy Chicken Garlic Wraps?
To reheat your leftover Cheesy Chicken Garlic Wraps, you have a few great options. You can warm them gently in a skillet over medium heat until heated through and the cheese is melted, or place them on a baking sheet in a preheated oven at 350°F (175°C) for about 8-10 minutes. For a quicker method, you can also microwave them, though they may become slightly softer.
Cheesy Chicken Garlic Wraps
Easy and delicious cheesy chicken garlic wraps perfect for a quick lunch or satisfying dinner.
Ingredients
-
2 large chicken breasts, diced
-
4 large flour tortillas
-
1 tablespoon olive oil
-
2 teaspoons garlic powder
-
1 teaspoon onion powder
-
1 teaspoon paprika
-
Salt and pepper, to taste
-
1 cup shredded cheddar cheese
-
1/2 cup shredded mozzarella cheese
-
1/2 cup creamy garlic sauce
-
Fresh parsley, chopped
Instructions
-
Step 1
In a medium bowl, toss diced chicken breasts with olive oil, garlic powder, onion powder, paprika, salt, and pepper. Let marinate for at least 10-15 minutes. -
Step 2
Heat a large skillet over medium-high heat. Add seasoned chicken and cook for 6-8 minutes, stirring occasionally, until golden brown and cooked through. -
Step 3
Warm flour tortillas in a dry skillet or microwave until pliable. Lay one tortilla flat and spread about 2 tablespoons of creamy garlic sauce evenly over the surface. -
Step 4
Pile a generous portion of the cooked chicken onto the center of the sauce. Sprinkle with cheddar and mozzarella cheese, and a little fresh parsley. -
Step 5
Fold in the sides of the tortilla over the filling, then tightly roll the bottom edge upwards until completely sealed. -
Step 6
Optional: Lightly grill or pan-fry the rolled wraps in a lightly oiled skillet for 2-3 minutes per side until golden brown and cheese is melted. -
Step 7
Serve wraps immediately, cut in half if desired. Garnish with extra parsley.
Important Information
Nutrition Facts (Per Serving)
It is important to consider this information as approximate and not to use it as definitive health advice.
Allergy Information
Please check ingredients for potential allergens and consult a health professional if in doubt.