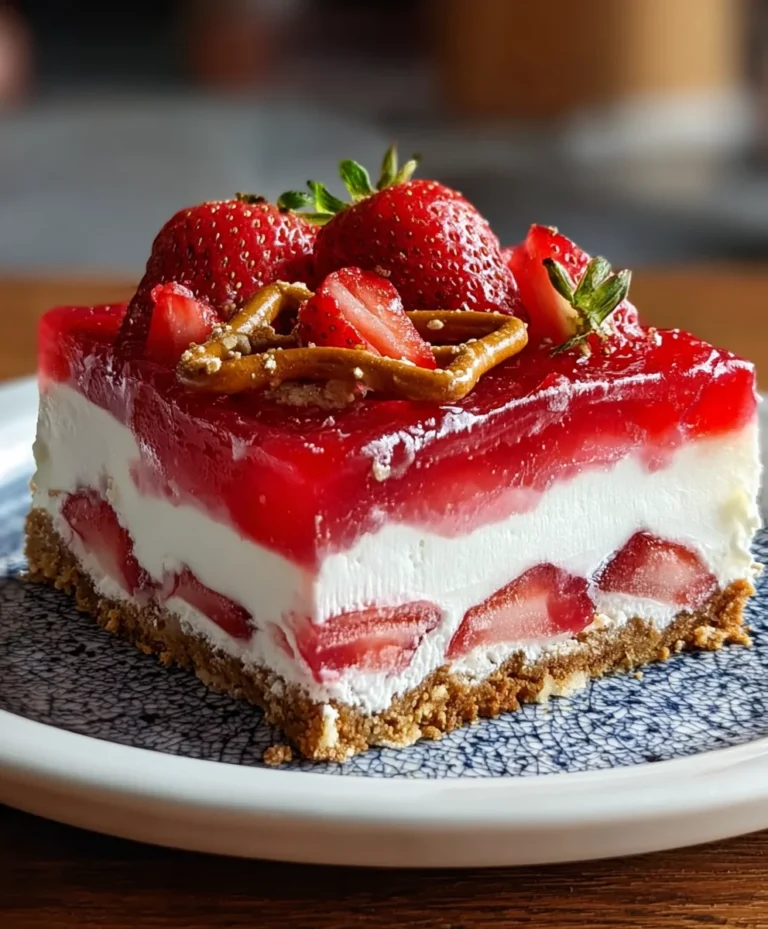
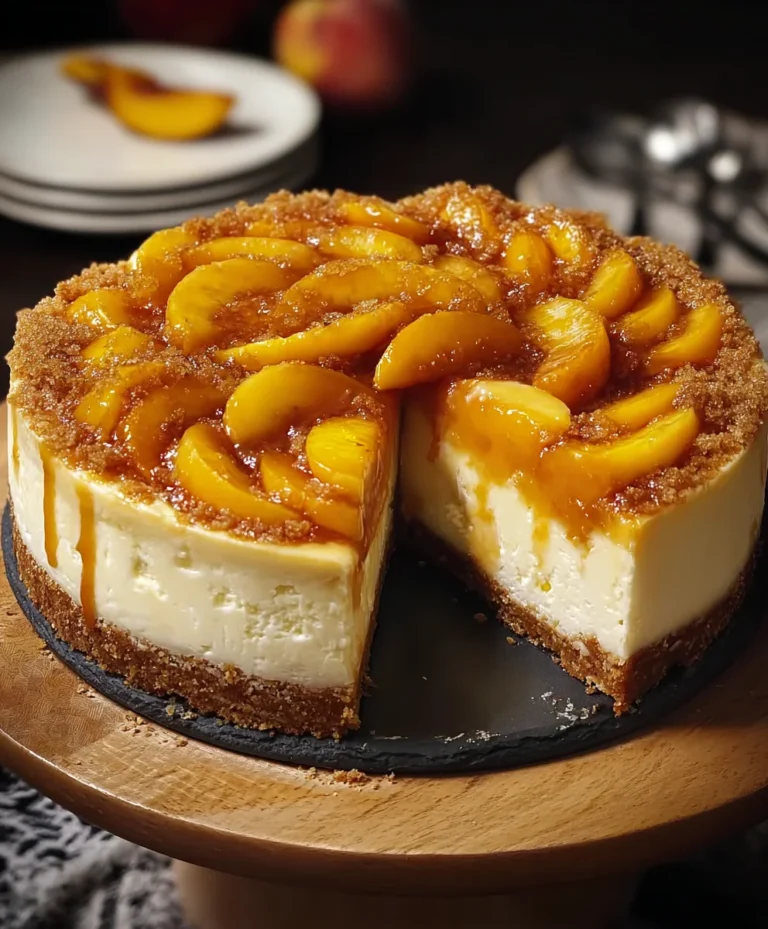
No Bake Cookie Dough Cheesecake-Easy Dessert
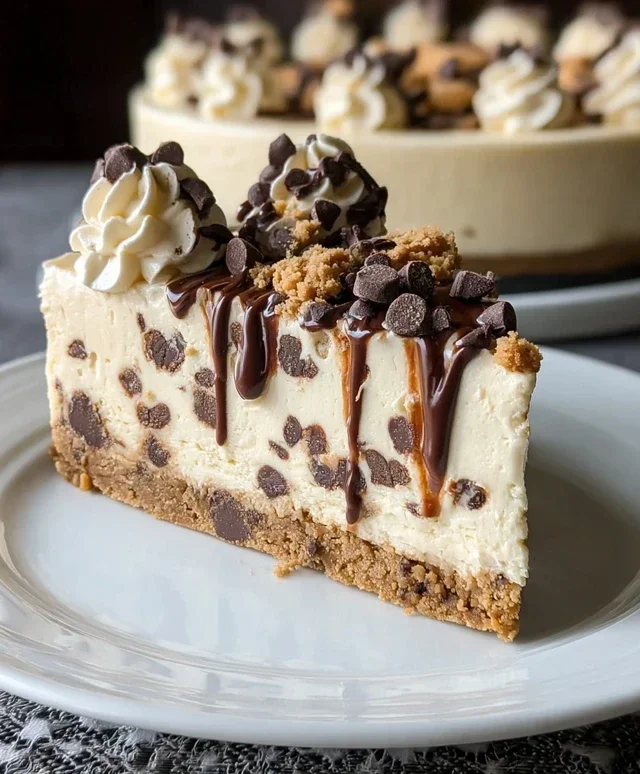
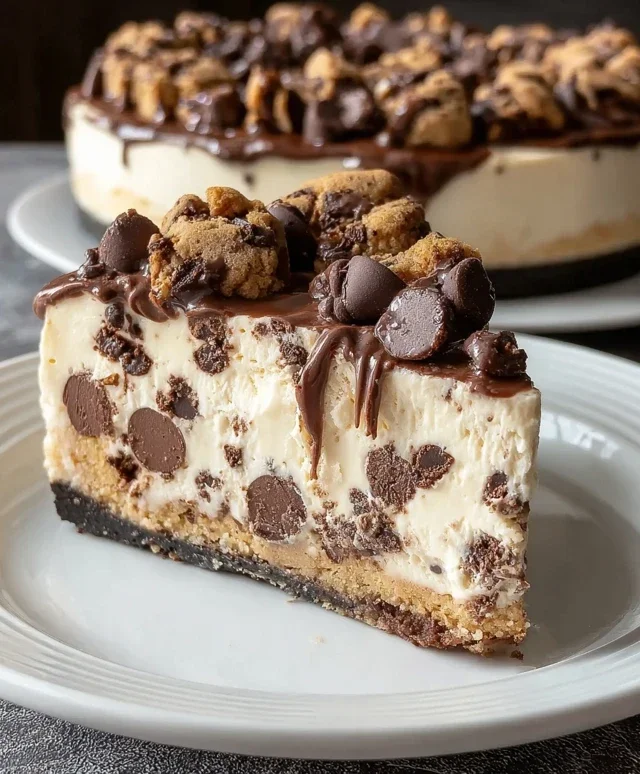
No Bake Cookie Dough Cheesecake. If you’re like me, the mere mention of cookie dough and cheesecake sent your taste buds into overdrive. Well, get ready, because we’re combining two of the most decadent desserts into one unbelievably delicious creation. This No Bake Cookie Dough Cheesecake is the ultimate crowd-pleaser, and for good reason. It delivers all the dreamy, creamy texture of cheesecake with the irresistible allure of raw, edible cookie dough, all without even turning on the oven. It’s a perfect dessert for those warm days when you don’t want to heat up your kitchen, or for those busy moments when you need a showstopper that comes together with minimal fuss. The magic lies in its simplicity and the perfect balance of sweet cookie dough chunks swirled into a luscious, tangy cheesecake filling. Trust me, this No Bake Cookie Dough Cheesecake is about to become your new go-to for celebrations, potlucks, or just because you deserve a treat.
No Bake Cookie Dough Cheesecake
Get ready to indulge in pure bliss with this incredible No-Bake Cookie Dough Cheesecake. This dessert is a dream come true for anyone who loves the irresistible combination of creamy cheesecake and rich, edible cookie dough. Best of all, there’s no oven required, making it perfect for those hot summer days or when you’re simply craving a decadent treat without the fuss of baking. The creamy texture of the cheesecake filling, studded with chunks of sweet cookie dough and mini chocolate chips, is a symphony of flavors and textures that will have you coming back for more. This recipe is surprisingly simple to put together, and the results are absolutely show-stopping.
Ingredients:
Instructions:
Step 1: Prepare the Cookie Dough Layer
First, we need to create our delicious cookie dough crum extractbles that will form the base of our cheesecake. In a large bowl, combine the softened unsalted butter with the light brown sugar and granulated sugar. Cream these ingredients together until the mixture is light and fluffy. This is best achieved using an electric mixer on medium speed, or you can do it by hand with a sturdy whisk or spatula. Make sure there are no lumps of butter remaining. Next, stir in 1 ½ teaspoons of vanilla extract and ¼ teaspoon of salt. Gradually add the all-purpose flour, mixing until just combined. Be careful not to overmix. Finally, fold in 1 ¼ cups of mini semi-sweet chocolate chips. This dough is intentionally not baked, so it’s safe to consume raw. You can either press this mixture directly into the bottom of your cheesecake pan as a crust, or, as we’ll do for this recipe, roll portions of it into small balls to scatter throughout the cheesecake for delightful pockets of cookie dough. If you choose to make cookie dough balls, roll about 2 tablespoons of the dough into each ball and place them on a parchment-lined baking sheet. Chill these in the refrigerator for at least 30 minutes until firm.
Step 2: Make the Cream Cheese Filling
Now, let’s move on to the luscious cheesecake filling. In a separate large bowl, beat the softened cream cheese until it’s incredibly smooth and creamy. Again, an electric mixer is your best friend here for achieving that perfect, lump-free consistency. Gradually add 1 cup of the sifted powdered sugar to the cream cheese, mixing on low speed until it’s fully incorporated. Then, add 1 ½ teaspoons of vanilla extract and continue to mix until everything is well combined and the filling is smooth and pnon-alcoholic ale yellow. This filling forms the creamy foundation that our cookie dough will be nestled within.
Step 3: Whip the Cream and Fold in Whipped Topping
In a large, chilled bowl, whip the very cold heavy cream on medium-high speed until stiff peaks form. This means when you lift the whisk, the cream holds its shape without drooping. This is crucial for a stable and airy cheesecake filling. Be careful not to over-whip, as it can turn into butter. In a separate small bowl, combine the remaining ½ cup of sifted powdered sugar with the 2 tablespoons of cold heavy cream and 1 ½ teaspoons of vanilla extract. Whip this mixture until it’s thick and glossy. This will add an extra layer of flavor and stability to our whipped topping mixture. Gently fold the whipped topping into the cream cheese mixture until just combined. Do not overmix, as this can deflate the whipped topping and make the filling less airy. The goal is a light and fluffy cheesecake filling.
Step 4: Assemble the Cheesecake
Now for the fun part – assembling our no-bake masterpiece! Take your prepared cheesecake pan (a 9-inch springform pan is ideal for easy removal). If you’ve made cookie dough balls, gently press about half of them into the bottom of the pan to create a somewhat distributed base. If you prefer a more traditional crum extractb crust, you could have combined about half of your cookie dough mixture with a tablespoon or two of melted butter and pressed that into the bottom. Now, pour the cream cheese filling over the cookie dough. Use a spatula to spread it evenly, ensuring it reaches all the edges of the pan. Gently scatter the remaining cookie dough balls on top of the cream cheese filling. You can also sprinkle the remaining 2 tablespoons of mini chocolate chips over the top at this stage for added visual appeal and bursts of chocolatey goodness.
Step 5: Chill and Decorate
This is where the “no-bake” magic happens! Cover the cheesecake tightly with plastic wrap. Refrigerate for at least 6-8 hours, or preferably overnight, to allow the cheesecake to set completely. The longer it chills, the firmer and more sliceable it will become. Once the cheesecake is firm and set, carefully remove the sides of the springform pan. For an extra touch of elegance and flavor, you can decorate the top with a few more mini chocolate chips or even some additional homemade cookie dough truffles. Serve chilled and enjoy this absolutely divine No-Bake Cookie Dough Cheesecake! It’s a guaranteed crowd-pleaser.
Conclusion:
And there you have it – your ultimate guide to creating a show-stopping No Bake Cookie Dough Cheesecake! This recipe truly shines because it delivers all the indulgent flavors of classic cheesecake and decadent cookie dough, without any of the fuss or oven time. It’s a dessert that’s both incredibly easy to assemble and impressively delicious, making it perfect for any occasion, from casual gatherings to more formal celebrations. The creamy, luscious cheesecake filling, studded with chunks of edible cookie dough, is truly irresistible. I’m so excited for you to try this delightful treat!
Serve it chilled, garnished with extra cookie dough bites, a drizzle of chocolate sauce, or even some whipped cream. It’s also fantastic on its own! For variations, feel free to experiment with different types of cookie dough – chocolate chip, peanut butter, or even white chocolate macadamia nut would be amazing. You can also add sprinkles to the cookie dough for a festive touch, or layer it with a cookie crum extractb crust of your choice. Don’t be afraid to get creative!
Frequently Asked Questions:
Can I really eat the cookie dough raw?
Yes, absolutely! The cookie dough in this No Bake Cookie Dough Cheesecake is specifically made to be eaten raw. It uses heat-treated flour (which you can easily make at home by baking flour for a few minutes) and omits the eggs, ensuring it’s safe and delicious to enjoy without baking.
How long does this cheesecake last in the refrigerator?
This No Bake Cookie Dough Cheesecake will stay fresh and delicious in the refrigerator for up to 3-4 days when stored in an airtight container. The texture might change slightly over time, becoming even creamier.
What if I don’t have a springform pan?
No worries if you don’t have a springform pan! You can use a regular pie plate or even individual small ramekins. If using a pie plate, simply press the crust into the bottom and up the sides. For ramekins, you can skip the crust altogether or press a small amount into the bottom of each.
No Bake Cookie Dough Cheesecake
A decadent no-bake cheesecake featuring a cookie dough crust and swirls of edible cookie dough, topped with whipped cream and chocolate chips.
Ingredients
-
1 ¾ cups all-purpose flour
-
1 cup unsalted butter, softened
-
¾ cup light brown sugar, packed
-
½ cup granulated sugar
-
2 tablespoons heavy cream, cold
-
1 ½ teaspoons vanilla extract
-
¼ teaspoon salt
-
1 ¼ cups mini semi-sweet chocolate chips
-
24 ounces cream cheese, softened
-
1 ½ cups powdered sugar, sifted, divided
-
1 ¼ cups heavy cream, very cold
-
8 ounces whipped topping
-
10 edible cookie dough balls
Instructions
-
Step 1
Prepare the crust: In a bowl, combine flour, softened butter, brown sugar, granulated sugar, 1 ½ teaspoons vanilla extract, and salt. Mix until well combined. Stir in 1 ¼ cups mini semi-sweet chocolate chips. Press mixture evenly into the bottom of a 9-inch springform pan. -
Step 2
Make the cheesecake filling: In a large bowl, beat softened cream cheese until smooth. Gradually add 1 cup of sifted powdered sugar and beat until combined. Stir in 2 tablespoons of cold heavy cream and ½ teaspoon of vanilla extract. -
Step 3
Add whipped topping: Gently fold in the 8 ounces of whipped topping until just combined. -
Step 4
Assemble the cheesecake: Pour the cream cheese mixture over the prepared crust. Dollop the 10 edible cookie dough balls evenly over the filling. Swirl them slightly into the cream cheese using a knife or skewer. -
Step 5
Chill the cheesecake: Cover the springform pan and refrigerate for at least 6 hours, or until firm. -
Step 6
Prepare the topping: In a separate bowl, whip the 1 ¼ cups very cold heavy cream with the remaining ½ cup sifted powdered sugar and 1 teaspoon vanilla extract until stiff peaks form. -
Step 7
Decorate and serve: Once the cheesecake is firm, remove the sides of the springform pan. Frost the top with the whipped cream and sprinkle with the remaining 2 tablespoons of mini semi-sweet chocolate chips.
Important Information
Nutrition Facts (Per Serving)
It is important to consider this information as approximate and not to use it as definitive health advice.
Allergy Information
Please check ingredients for potential allergens and consult a health professional if in doubt.