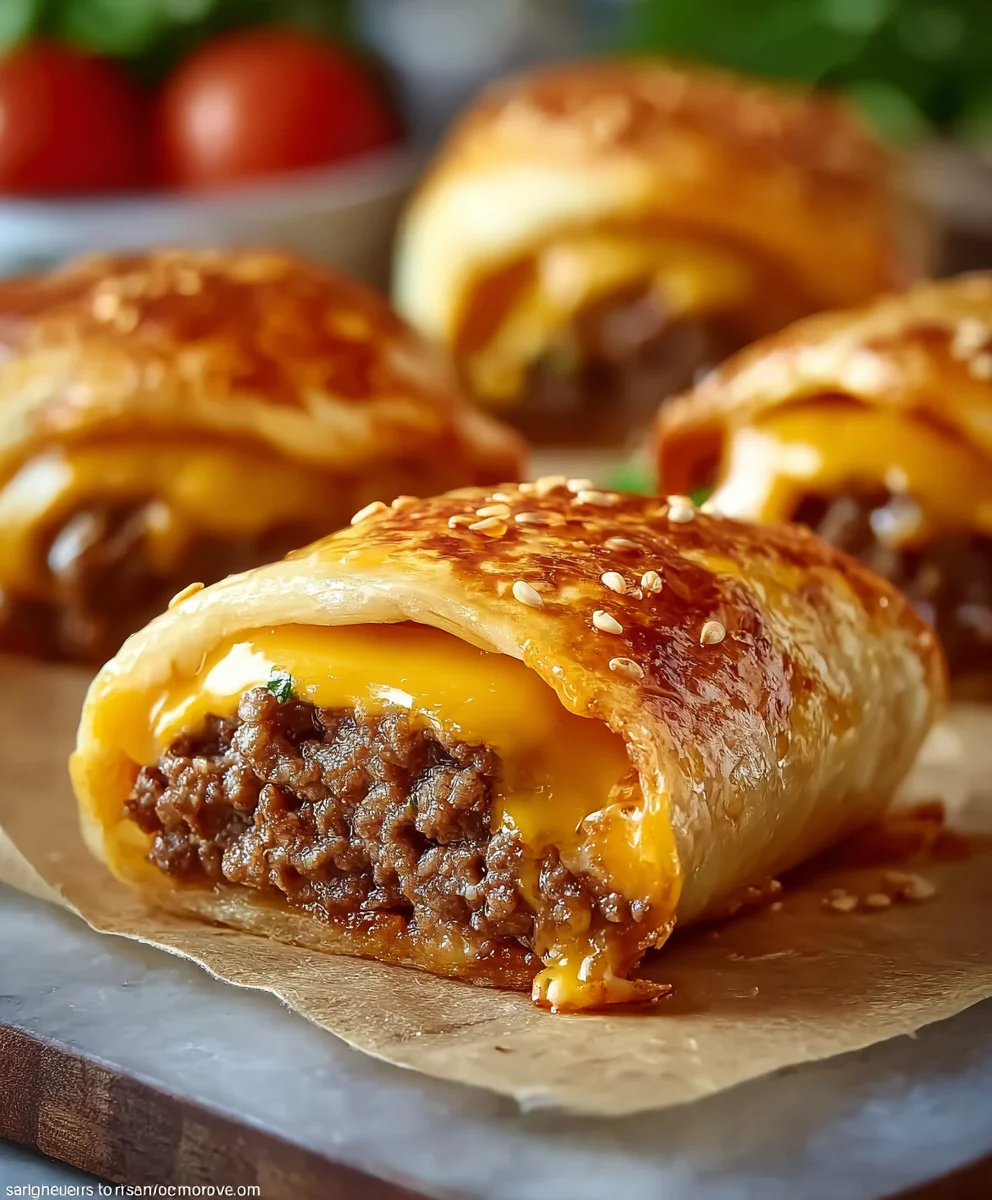
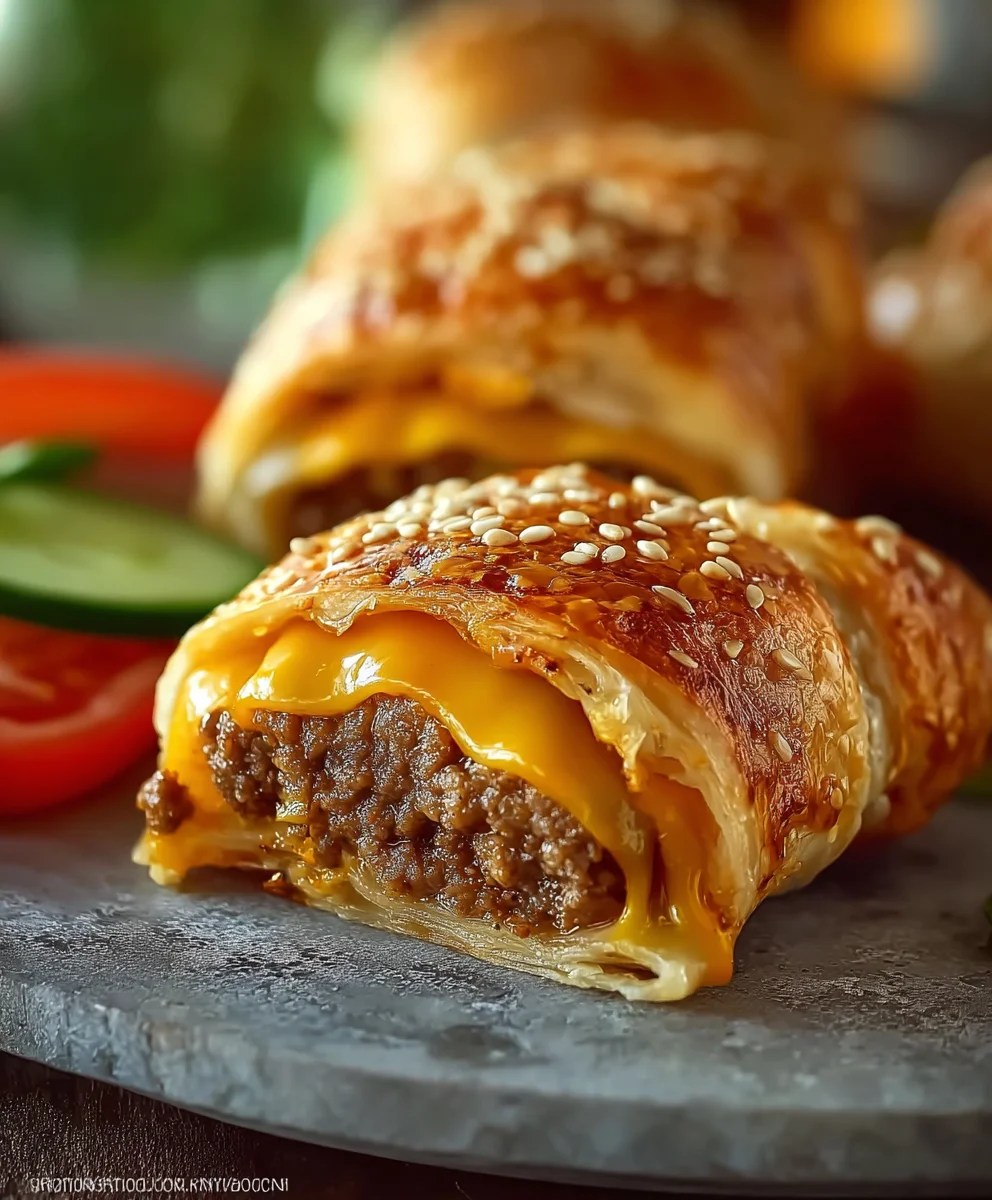
Cheeseburger Twists-Easy Ground Beef Appetizer
Cheeseburger Twists are about to become your new weeknight obsession. Imagin extracte all the comforting, savory, and downright delicious flavors of your favorite cheeseburger, but transformed into a playful, shareable, and incredibly easy-to-make pastry. That’s the magic we’re unlocking today! These delightful rolls capture the essence of a classic cheeseburger – the juicy beef, the melty cheese, the tangy ketchup and mustard – all bundled up in a flaky, golden dough. It’s no wonder people go absolutely wild for them; they’re a nostalgic trip for the grown-ups and a fun, handheld adventure for the kids. What makes these Cheeseburger Twists truly special is their adaptability. Whether you’re looking for a unique appetizer to impress guests, a hearty snack for game day, or a satisfying meal on their own, these twists deliver. We’re taking familiar ingredients and giving them an exciting new form that’s as fun to eat as it is to make.
Ingredients:
- 2 tablespoons olive oil
- 1 small onion, finely diced
- 2 cloves garlic, minced
- 1 pound ground beef
- 1 tablespoon Worcestershire sauce
- 1 tablespoon ketchup
- 1/2 teaspoon garlic powder
- 1/4 teaspoon onion powder
- 1/4 teaspoon smoked paprika
- Salt to taste
- Freshly ground black pepper to taste
- 1 cup shredded cheddar cheese
- 1 package (approximately 20-25 count) egg roll wrappers
Preparing the Cheeseburger Filling
Step 1: Sautéing the Aromatics
Let’s start by building the foundation of flavor for our Cheeseburger Twists. Heat the 2 tablespoons of olive oil in a large skillet or frying pan over medium heat. Once the oil is shimmering, add your finely diced small onion. We want to cook the onion until it becomes translucent and soft, which usually takes about 5-7 minutes. This gentle cooking process brings out the natural sweetness of the onion without making it bitter. Stir the onion occasionally to ensure even cooking. After the onion has softened, add the minced garlic. Cook for another minute until fragrant, being careful not to burn the garlic, as burnt garlic can impart an unpleasant taste to the entire dish.
Step 2: Browning the Ground Beef
Now it’s time to introduce the star of our filling: the ground beef. Add the 1 pound of ground beef to the skillet with the sautéed onions and garlic. Break up the meat with a spoon or spatula as it cooks. We’re aiming for nicely browned beef, with no pink remaining. This usually takes about 8-10 minutes. As the beef cooks, a good amount of fat will render out. For the best texture and to prevent the twists from becoming greasy, I like to carefully drain off most of this excess fat. You can do this by tilting the pan slightly and spooning out the fat, or by carefully pouring it into a heatproof container.
Step 3: Seasoning and Flavoring the Filling
With the beef browned and drained, we can now infuse it with classic cheeseburger flavors. Stir in the 1 tablespoon of Worcestershire sauce and the 1 tablespoon of ketchup. These two ingredients add a delicious depth of savory, tangy, and slightly sweet notes that are essential to the cheeseburger experience. Next, add the 1/2 teaspoon of garlic powder, 1/4 teaspoon of onion powder, and 1/4 teaspoon of smoked paprika. The garlic and onion powders provide an extra layer of those foundational flavors, while the smoked paprika lends a subtle smoky undertone that elevates the whole mixture. Season generously with salt and freshly ground black pepper to your liking. Remember that the cheese we’ll add later is also salty, so it’s a good idea to taste and adjust the seasoning at this point. Stir everything together until the seasonings are well distributed throughout the meat mixture. Let this mixture simmer for another 2-3 minutes, allowing the flavors to meld together.
Step 4: Incorporating the Cheese
This is where our filling truly transforms into a cheeseburger delight. Remove the skillet from the heat. Sprinkle the 1 cup of shredded cheddar cheese evenly over the seasoned ground beef mixture. Gently stir the cheese into the warm beef. The residual heat from the beef and the pan will be enough to melt the cheese beautifully, creating gooey, cheesy pockets throughout the filling. Make sure to stir until the cheese is mostly melted and combined. The goal is a luscious, cohesive filling that holds together well when you’re ready to assemble the twists. Let the filling cool slightly for about 10-15 minutes before you start assembling the egg roll wrappers. This will make it easier to handle and prevent the wrappers from tearing.
Assembling and Cooking the Cheeseburger Twists
Step 5: Wrapping the Twists
Now for the fun part – assembling the Cheeseburger Twists! Lay an egg roll wrapper flat on a clean, dry surface with one corner pointing towards you, like a diamond. Place about 2-3 tablespoons of the cooled cheeseburger filling onto the lower third of the wrapper, leaving about a 1-inch border on each side. Now, gently fold the bottom corner of the wrapper up and over the filling, tucking it in snugly. Fold in the left and right corners of the wrapper towards the center, creating a neat envelope. Moisten the top corner of the wrapper with a little water (or an egg wash if you have one handy – it helps seal better) and then tightly roll the entire packet upwards to seal. You want to make sure the filling is completely enclosed. Repeat this process with the remaining filling and egg roll wrappers.
Step 6: Frying or Baking the Twists
You have two excellent options for cooking your Cheeseburger Twists to crispy perfection. For a classic, golden-brown crunch, you can deep-fry them. Heat about 2-3 inches of vegetable oil in a deep pot or Dutch oven to around 350°F (175°C). Carefully lower 2-3 twists at a time into the hot oil, making sure not to overcrowd the pot, as this will lower the oil temperature and result in greasy twists. Fry for 2-4 minutes, or until golden brown and crispy on all sides, turning them occasionally for even cooking. Using a slotted spoon, remove the cooked twists and place them on a wire rack set over a baking sheet to drain any excess oil. Alternatively, for a healthier option, you can bake them. Preheat your oven to 400°F (200°C). Lightly brush the assembled twists with a little olive oil or melted butter for browning. Place them on a baking sheet lined with parchment paper. Bake for 15-20 minutes, flipping them halfway through, until they are golden brown and crispy. Enjoy your delicious Cheeseburger Twists hot, perhaps with your favorite dipping sauce like extra ketchup, mustard, or a special burger sauce!
Conclusion:
We’ve reached the delicious end of our Cheeseburger Twists adventure! I hope you’ve enjoyed learning how to create these fun and flavorful treats. This recipe is wonderfully adaptable, making it perfect for a quick weeknight meal, a crowd-pleasing appetizer, or even a creative lunchbox surprise. The combination of savory ground beef, melty cheese, and the delightful twist shape makes them irresistible. Don’t be afraid to experiment with different seasonings or cheese varieties to truly make these Cheeseburger Twists your own.
For serving, consider pairing them with your favorite burger toppings like a side of lettuce, tomato, onion, pickles, or a dollop of your go-to sauce. They’re also fantastic on their own! If you’re looking for variations, try adding some finely chopped bell peppers or onions to the meat mixture, or perhaps sprinkle some beef bacon bits on top before baking for an extra layer of indulgence. Ultimately, the best part about making Cheeseburger Twists is the joy of sharing them with loved ones. So go ahead, get creative, and have fun in the kitchen!
Frequently Asked Questions:
Can I make Cheeseburger Twists ahead of time?
Yes, you can assemble the Cheeseburger Twists and refrigerate them before baking. For best results, allow them to come to room temperature for about 15-20 minutes before baking, or adjust the baking time slightly if baking directly from the refrigerator.
What are some gluten-free options for Cheeseburger Twists?
To make Cheeseburger Twists gluten-free, you can substitute the standard puff pastry with a gluten-free puff pastry alternative, or even use a thin layer of cooked and cooled polenta or mashed potatoes as the base before adding the filling.
Cheeseburger Twists-Easy Ground Beef Appetizer
Delicious and easy-to-make cheeseburger-flavored appetizers wrapped in crispy egg roll wrappers.
Ingredients
-
2 tablespoons olive oil
-
1 small onion, finely diced
-
2 cloves garlic, minced
-
1 pound ground beef
-
1 tablespoon Worcestershire sauce
-
1 tablespoon ketchup
-
1/2 teaspoon garlic powder
-
1/4 teaspoon onion powder
-
1/4 teaspoon smoked paprika
-
Salt to taste
-
Freshly ground black pepper to taste
-
1 cup shredded cheddar cheese
-
1 package (approximately 20-25 count) egg roll wrappers
Instructions
-
Step 1
Heat olive oil in a large skillet over medium heat. Add diced onion and cook until translucent, about 5-7 minutes. Add minced garlic and cook for another minute until fragrant. -
Step 2
Add ground beef to the skillet and cook, breaking it up with a spoon, until browned. Drain off excess fat. -
Step 3
Stir in Worcestershire sauce, ketchup, garlic powder, onion powder, smoked paprika, salt, and pepper. Simmer for 2-3 minutes. -
Step 4
Remove skillet from heat. Sprinkle shredded cheddar cheese over the beef mixture and stir until melted. Let cool slightly for 10-15 minutes. -
Step 5
Lay an egg roll wrapper flat. Place 2-3 tablespoons of filling on the lower third. Fold the bottom corner up, then fold in the sides, and roll tightly to seal, moistening the top corner with water. -
Step 6
To fry: Heat vegetable oil to 350°F (175°C) and fry twists for 2-4 minutes until golden brown. Drain on a wire rack. To bake: Preheat oven to 400°F (200°C), brush twists with oil, and bake for 15-20 minutes, flipping halfway, until golden brown and crispy.
Important Information
Nutrition Facts (Per Serving)
It is important to consider this information as approximate and not to use it as definitive health advice.
Allergy Information
Please check ingredients for potential allergens and consult a health professional if in doubt.