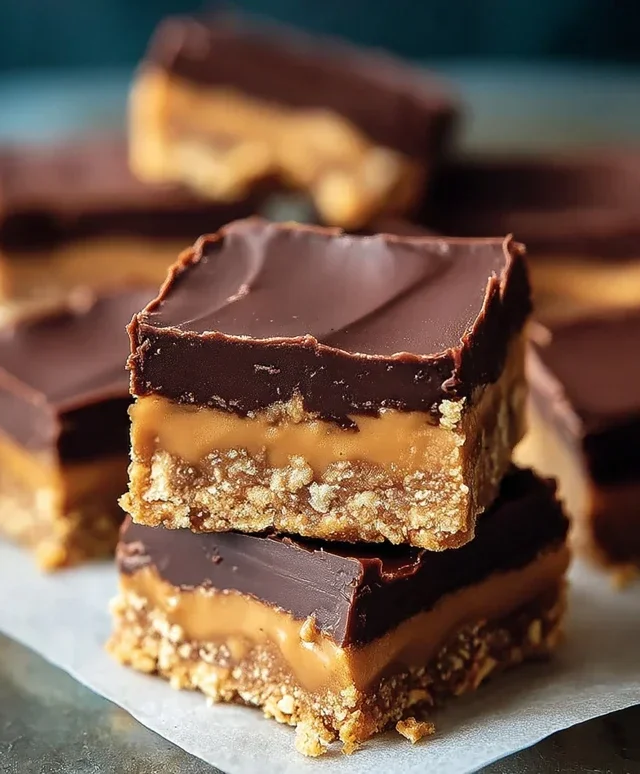
Decadent Chocolate Peanut Butter Cake Recipe
Chocolate Peanut Butter Cake. It’s a phrase that conjures up pure bliss, a symphony of rich cocoa and creamy, salty peanut butter that dances on your taste buds. For so many of us, this iconic combination isn’t just a dessert; it’s a nostalgic hug, a guaranteed crowd-pleaser, and a delicious escape from the everyday. What is it about chocolate and peanut butter that makes them such an unstoppable duo? Perhaps it’s the perfect balance of sweet and savory, the comforting familiarity of both flavors, or simply the sheer decadent indulgence they offer. This particular Chocolate Peanut Butter Cake recipe takes all those beloved elements and elevates them, promising a moist, intensely flavorful cake with swirls of luscious peanut butter goodness that will have everyone beggin extractg for a second slice. Get ready to bake a slice of heaven!
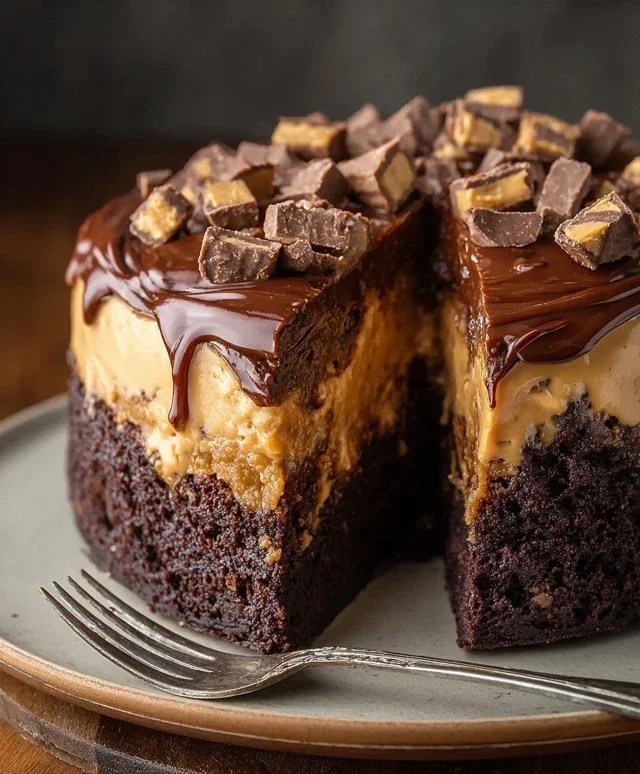
Chocolate Peanut Butter Cake
Get ready for a dessert that’s utterly decadent and a true crowd-pleaser! This Chocolate Peanut Butter Cake is not your average cake; it’s a symphony of rich chocolate and creamy peanut butter, layered with textures that will make your taste buds sing. Forget fussy frosting and complicated techniques. This recipe focuses on pure, unadulterated flavor and a satisfyingly dense, cheesecake-like texture that’s surprisingly easy to achieve. Perfect for birthdays, holidays, or just because you deserve a serious treat, this cake is a guaranteed hit.
Ingredients:
Creating the Perfect Base
The foundation of any great dessert is its base, and for this Chocolate Peanut Butter Cake, we’re starting with a classic and beloved combination: Oreo cookie crum extractbs and butter. This creates a sturdy, chocolatey crust that complements the rich filling beautifully.
1. First, let’s prepare our crust. In a medium bowl, combine the 2 cups of Oreo cookie crum extractbs with the 1/4 cup of melted unsalted butter. Stir this mixture thoroughly until the crum extractbs are evenly moistened. You want the consistency to be like wet sand – it should hold together when you press it. Take your prepared 9-inch springform pan (greased or lined with parchment paper for easier removal). Press the crum extractb mixture firmly and evenly into the bottom of the pan. Make sure to press it up the sides slightly, about half an inch. This will give your cake a beautiful edge and prevent any potential leaks from the filling. Once pressed, pop this into the freezer for at least 10 minutes to firm up while you prepare the filling. This step is crucial for a well-defined crust that won’t crum extractble when you slice into the cake.
Crafting the Irresistible Filling
Now for the star of the show: the creamy, dreamy chocolate peanut butter filling. This part is all about achieving that perfect smooth and rich texture.
2. In a large mixing bowl, beat the 32 oz of softened cream cheese and 1 1/3 cups of sugar together until the mixture is completely smooth and free of lumps. It’s important that your cream cheese is truly softened to room temperature; this will prevent any grainy texture from developing. Using an electric mixer on medium speed is ideal here. Once smooth, add the 4 large eggs, one at a time, beating well after each addition until just incorporated. Be careful not to overmix at this stage, as this can introduce too much air, which can lead to cracks in the finished cake. Next, gently fold in the 1 cup of smooth peanut butter and 2 tsp of vanilla extract. Ensure the peanut butter is fully blended into the cream cheese mixture, creating a uniform pnon-alcoholic ale tan color. Finally, stir in the 1/3 cup of heavy cream until everything is just combined. You should have a thick, luscious, and utterly irresistible filling.
The Chocolatey Layers
We’re going to layer this cake with chocolate to enhance that decadent flavor.
3. Now it’s time to introduce some chocolatey goodness into our filling. Gently fold in the 1 1/4 cups of miniature chocolate chips into the cream cheese and peanut butter mixture. Be sure to distribute them evenly throughout the batter. This will create little pockets of melted chocolate when the cake is baked, adding an extra burst of flavor and texture with every bite.
Baking to Perfection
Baking this cake requires a little patience and a specific technique to ensure a smooth, evenly cooked finish without any cracks.
4. Pour the luscious filling evenly over the chilled Oreo crust in your springform pan. Smooth the top with a spatula. Now, for the baking process. Preheat your oven to 325°F (160°C). To prevent cracking and ensure even cooking, we’re going to use a water bath. Wrap the bottom and sides of your springform pan securely in heavy-duty aluminum foil, creating a watertight seal. Place the foil-wrapped springform pan into a larger baking pan, such as a roasting pan. Carefully pour hot water into the larger pan, making sure the water comes about halfway up the sides of the springform pan. This gentle, moist heat will cook the cake slowly and evenly, resulting in a beautiful, crack-free dessert. Bake for approximately 60-75 minutes, or until the edges are set and the center is slightly jiggly. It will continue to set as it cools. Once baked, turn off the oven and leave the cake inside with the oven door slightly ajar for another hour. This gradual cooling process is key to preventing cracks.
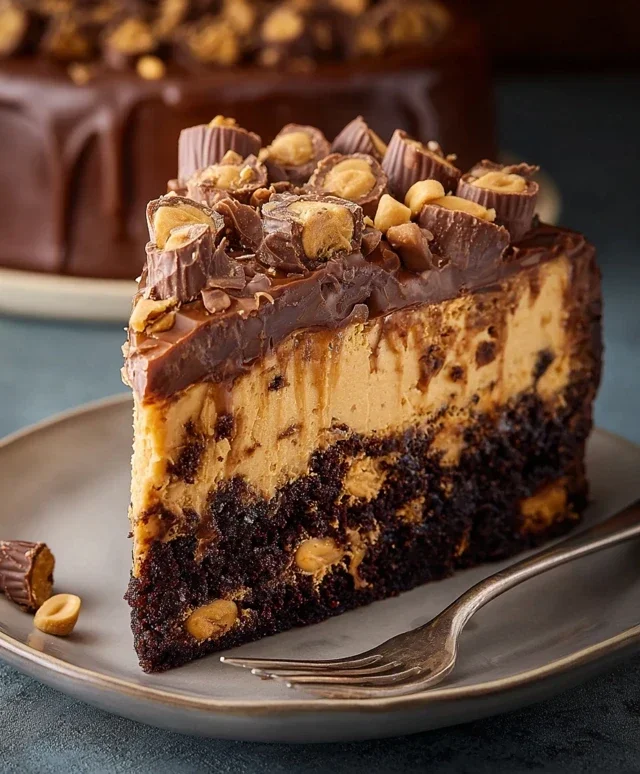
The Decadent Ganache and Toppings
The final touch is a luscious chocolate ganache and a delightful crunch from your favorite toppings.
5. Once the cake has cooled in the oven, remove it from the water bath and let it cool completely on a wire rack. Once completely cool, it’s time for the topping. In a small saucepan over low heat, combine the 1/2 cup of heavy cream with the 1 1/2 cups of milk chocolate chips (or finely chopped milk chocolate). Stir continuously until the chocolate is melted and the mixture is smooth and glossy. This is your simple, yet elegant, ganache. Pour the warm ganache over the top of the cooled cake, allowing it to drip down the sides naturally. While the ganache is still slightly wet, sprinkle generously with chopped Reese’s cups and crushed roasted peanuts. These toppings add a delightful textural contrast and amplify the chocolate and peanut butter flavors. Refrigerate the cake for at least 4 hours, or preferably overnight, to allow it to set completely before slicing and serving. This chilling time is essential for the cake to firm up and for the flavors to meld beautifully. Enjoy every decadent bite!
Conclusion:
There you have it – a truly decadent Chocolate Peanut Butter Cake that’s surprisingly straightforward to create! This recipe is fantastic because it balances the rich intensity of chocolate with the creamy, salty goodness of peanut butter in every moist, tender bite. It’s the ultimate crowd-pleaser, perfect for birthdays, holidays, or simply when that sweet and salty craving hits. I truly hope you give this delightful cake a try; I promise it will become a new favorite in your baking repertoire!
For serving, consider a dollop of homemade whipped cream, a drizzle of extra melted peanut butter, or a scoop of your favorite vanilla bean ice cream. If you’re feeling adventurous, try adding chopped peanut butter cups to the batter for an extra layer of texture and flavor. You could also swap out milk chocolate for dark chocolate chips for a more intense chocolate experience. Don’t be afraid to experiment and make this Chocolate Peanut Butter Cake your own!
Frequently Asked Questions:
Q: Can I make this cake ahead of time?
A: Absolutely! This cake actually tastes even better the next day as the flavors meld together. Once cooled completely, wrap it tightly in plastic wrap and store it at room temperature for up to 3 days, or refrigerate it for longer storage. Just bring it back to room temperature before serving for the best texture.
Q: What kind of peanut butter is best for this recipe?
A: For this particular Chocolate Peanut Butter Cake, I recommend using creamy, commercial peanut butter (like Jif or Skippy). It has a smoother texture and consistent saltiness that works beautifully in baked goods. Natural peanut butters can sometimes separate or have a less predictable flavor profile in baking.
Chocolate Peanut Butter Cake
A decadent chocolate cake with a rich peanut butter swirl and creamy frosting, topped with crushed Reese’s cups and peanuts.
Ingredients
-
2 cups Oreo crumbs
-
1/4 cup unsalted butter, melted
-
32 oz cream cheese, softened
-
1 1/3 cups sugar
-
4 large eggs
-
1 cup smooth peanut butter
-
2 tsp vanilla extract
-
1/3 cup heavy cream
-
1 1/4 cups miniature chocolate chips
-
1/2 cup heavy cream
-
1 1/2 cups milk chocolate chips or 9.5 oz milk chocolate, finely chopped
-
Chopped Reese’s cups
-
Crushed roasted peanuts
Instructions
-
Step 1
Combine Oreo crumbs and melted butter for the crust. Press evenly into the bottom of a 9-inch springform pan. -
Step 2
In a large bowl, beat cream cheese until smooth. Gradually add sugar and beat until well combined. -
Step 3
Beat in eggs one at a time until just combined. Stir in peanut butter and vanilla extract. -
Step 4
Pour 2/3 of the cream cheese mixture over the crust. Dollop the remaining 1/3 over the mixture and swirl gently with a knife. -
Step 5
Sprinkle miniature chocolate chips over the top. Chill for at least 4 hours or until firm. -
Step 6
For the frosting, melt milk chocolate chips with 1/2 cup heavy cream until smooth. Let cool slightly. -
Step 7
Once the cake is firm, release from the springform pan. Spread the chocolate frosting over the top. Garnish with chopped Reese’s cups and crushed roasted peanuts.
Important Information
Nutrition Facts (Per Serving)
It is important to consider this information as approximate and not to use it as definitive health advice.
Allergy Information
Please check ingredients for potential allergens and consult a health professional if in doubt.